Why Is My Bread Dense?

Dense bread almost always comes down to one of four things, and in this order of likelihood: dead or old yeast, too much flour, under-proofing, or not enough gluten development. Work through them in that order and you'll find the culprit on the first or second try.
The good news is that the loaf itself tells you which one it was. A gummy crumb points somewhere different than a tight, even crumb, and a loaf that spread sideways failed for a different reason than one that rose and then sank.
Weigh your flour before you do anything else: our free grams to cups converter turns any cup measurement into grams, which fixes the single most common cause on this list.
Updated August 2026
Why is my bread dense? Read the loaf first
Cut the loaf and look at the crumb before you change anything. The pattern of the holes and the shape of the loaf narrow it down fast.
| What you're seeing | Most likely cause | The fix |
|---|---|---|
| Gummy, damp crumb that smears on the knife and sticks to your teeth | Underbaked, or sliced while still warm | Bake to 190 to 200°F internal for enriched loaves, 200 to 210°F for lean bread. Then cool completely, at least 2 hours, before cutting |
| Tight, even crumb with tiny uniform holes and a heavy feel, but a normally shaped loaf | Too much flour, or under-kneaded | Weigh the flour at 125 g per cup. Knead to the windowpane test instead of to a timer |
| Squat loaf that spread sideways instead of up, with a pale flat top | Over-proofed, or gluten too weak to hold the shape | Shape with more tension, cut the final proof short, and bake in a pan or a Dutch oven for support |
| Rose beautifully, then collapsed in the oven or right after | Over-proofed past the peak, too much yeast, or oven not hot enough | Use the poke test instead of the clock, drop the yeast, and confirm the oven is fully preheated |
| Barely rose at all, dough looked the same after two hours | Dead yeast, or liquid hot enough to kill it | Proof the yeast first. Keep liquid at 105 to 110°F |
| Dense bottom half, open top half | Under-proofed and the loaf tore upward, or the dough was too slack when it went in the pan | Give the final proof more time, judge by the poke test |
Each of those gets a full section below. Start with the row that matches your loaf.
Cause 1: your yeast was dead or tired
This is first on the list because it's the most common and the easiest to rule out, and because everything else you might try is wasted effort if the yeast was never alive.
Yeast dies quietly. It doesn't smell wrong or look different. An expired packet from the back of the pantry looks exactly like a fresh one.
Test it in ten minutes. Stir 1 teaspoon of your yeast and 1 teaspoon of sugar into 1/2 cup of water at 105 to 110°F. Wait ten minutes. You want a thick, foamy, visibly domed head. A few sad bubbles means it's weak, and no change at all means it's gone. How to proof yeast covers this in detail.
Things that kill yeast without you noticing:
- Liquid over about 130°F. This is the big one. Water that feels hot on your wrist is often already there. 105 to 110°F feels barely warm, like bathwater you'd describe as tepid.
- Direct contact with salt in a dry bowl before the water goes in. Pile them on opposite sides.
- Age plus air. An opened jar of yeast in a warm cabinet loses strength fast. Once opened, yeast belongs in the freezer, where it keeps for a year or more.
- A cold kitchen. The yeast isn't dead here, it's just slow. A 65°F kitchen can easily double the rise time versus a 75°F one, and if you're going by the clock you'll bake an under-proofed loaf and blame the yeast.
Dosing matters too. One US packet is 2 1/4 teaspoons and weighs 7 g, and that's sized for about 500 g of flour in a same-day loaf. Using less than the recipe says, or subbing active dry for instant one-for-one, gives you a slow rise that runs out of time. Our yeast converter handles that swap, and active dry vs instant yeast explains why they aren't interchangeable by volume.
Cause 2: too much flour, and the measuring cup problem
If the yeast was fine, this is almost certainly it, and it's worth doing the math because the size of the error surprises people.
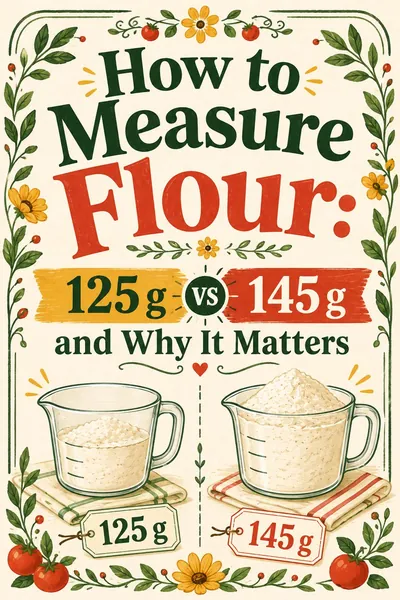
A cup of all-purpose flour weighs 125 g if you spoon it in and level it, and about 145 g if you dip the cup into the bag. That's a 20 g difference per cup, from nothing more than how you filled it. Sifted flour comes in around 115 g, which is why the word order in "1 cup sifted flour" versus "1 cup flour, sifted" actually matters.
Now scale that up. A recipe calling for 3 cups of flour:
- Spoon and level: 3 × 125 = 375 g
- Scoop and sweep: 3 × 145 = 435 g
- Difference: 60 g of extra flour
Sixty grams doesn't sound like much. Watch what it does to the dough.
Say the recipe pairs those 3 cups with 1 cup of water, which is 236 g.
- Intended dough: 236 ÷ 375 = 62.9% hydration. That's a soft, smooth sandwich dough that kneads easily.
- What you actually made: 236 ÷ 435 = 54.3% hydration. That's stiff bagel-and-pretzel territory.
You didn't make a slightly drier version of the recipe. You made a different dough. It fights you while kneading, it rises slowly because the yeast has less free water to move through, and it bakes into a tight, heavy, close-grained loaf. Bakers percentage explains why hydration is the number that predicts almost everything about how a dough behaves.
The fix is a scale, and it's not close. Weighing removes the entire variable. If you don't have one yet, spoon the flour into the cup and level with the back of a knife, never dip, and never tap the cup on the counter. How to measure flour has all three methods with the numbers.
One more version of the same mistake: flour added during kneading. Sticky dough is normal, and the instinct to keep dusting the counter can push another 30 to 60 g into a loaf without anyone tracking it. Use a bench scraper and lightly oiled hands instead. Most sticky dough stops being sticky after a few more minutes of work, because the flour is still absorbing water.
Cause 3: under-proofing, and the poke test
Under-proofed dough hasn't built up enough gas to open the crumb, and it doesn't have the extension to expand in the oven. The result is a heavy loaf, often with a dense band near the bottom and a tear along one side where it burst trying to grow.
Recipes give proof times as a guess. Real proof time depends on your kitchen temperature, your yeast dose, your flour, and how much salt is in the dough. A recipe that says "1 hour" was written in someone else's kitchen.
The poke test, precisely
Do this at the end of the final proof, once the dough is shaped and in its pan or basket.
- Dip one fingertip in flour so it doesn't stick and drag the surface.
- Press straight into the side of the dough, about half an inch deep. The side, not the top, because you don't want to damage the surface you're about to bake.
- Pull your finger out and watch the dent.
What you see:
- The dent springs back fast and disappears completely. Under-proofed. The gluten is still tight and there isn't enough gas yet. Give it another 15 to 20 minutes and test again.
- The dent springs back slowly and leaves a shallow depression that doesn't fully close. Ready. Bake it now.
- The dent stays exactly where you put it and doesn't move. Over-proofed. The gluten has stretched past its limit and won't recover.
- The dough sighs, deflates, or feels like a balloon losing air. Badly over-proofed. Bake it right away and accept a flat loaf, or reshape it and give it a short second proof, which usually rescues most of it.
Over-proofed and under-proofed look different in the finished loaf
Under-proofed gives you a dense but tall loaf, often with a big irregular tear on one side, a tight crumb near the base, and sometimes a dramatic burst where the dough blew out at its weakest point.
Over-proofed gives you a squat, spread-out loaf with a pale flat top, a crumb with large ragged holes and thin walls, and sometimes a slightly sour or beery smell. It may collapse the moment the oven door opens.
Both are dense. They need opposite fixes, which is why guessing costs you a second loaf.
The bulk fermentation trap
Under-proofing usually starts earlier than people think. If bulk fermentation (the first rise, before shaping) was cut short, the final proof can't fix it. The dough needs that first stretch to build both gas and extensibility.
Look for the dough to roughly double in volume and to feel airy and jiggly rather than dense when you tip the bowl. Time is a rough guide. Volume and feel are the actual signal.
Cause 4: not enough gluten development
Gluten is the protein network that traps the gas your yeast makes. Weak network, escaped gas, dense bread. Simple as that.
The windowpane test
This is the only reliable check, and it takes fifteen seconds.
- Pinch off a piece of dough about the size of a golf ball.
- Stretch it gently between the fingers and thumbs of both hands, working outward from the center, turning as you go.
- Hold it up to a light.
If it stretches into a thin membrane you can see light through before it tears, the gluten is developed. Keep going if it tears immediately into a thick ragged edge.
Enriched and whole grain doughs won't ever get quite as clear a windowpane as a lean white dough, and that's expected. Fat interferes with the network and bran physically cuts it. Judge those against a slightly lower bar.
The other two checks
Smooth surface. Developed dough looks satiny rather than shaggy or lumpy. If it still looks like it did five minutes in, keep working.
Spring-back. Press a finger into the mass of dough on the counter. Developed dough pushes back and slowly fills the dent. Undeveloped dough just holds the dent like clay.
How long is long enough
By hand, 8 to 12 minutes of active kneading is the usual range for a lean dough. In a stand mixer with a dough hook on low, 6 to 8 minutes. Wet doughs and no-knead doughs use folds and time instead, which works just as well.
Over-kneading is essentially impossible by hand and quite possible with a mixer, where an over-worked dough goes slack, shiny and soupy and won't hold a shape. Our full guide to how to knead dough covers every method with times.
A shortcut worth knowing: an autolyse, which just means mixing the flour and water and letting them sit for 20 to 60 minutes before adding salt and yeast, does a meaningful chunk of the gluten development for you while you do nothing. It's the cheapest improvement available to a beginner.
Flour protein: bread flour vs all-purpose
The flour itself sets a ceiling on how much gluten you can build. You can knead a low-protein flour all day and it won't behave like a high-protein one.
| Flour | Protein | Weight per cup | What it does in bread |
|---|---|---|---|
| Cake flour | 7 to 9% | 114 g | Almost no structure. Never use it alone for yeast bread |
| All-purpose | 10 to 12% | 125 g | Works fine. Softer crumb, slightly less rise, a bit less chew |
| Bread flour | 12 to 14% | 127 g | More gluten, better gas retention, taller loaf, chewier crumb |
For a sandwich loaf, all-purpose is genuinely fine and lots of good bread is made with it. For a high-hydration rustic loaf, bagels, or anything that needs to hold a tall open structure, bread flour makes a visible difference.
One catch when you swap. Bread flour absorbs more water than all-purpose, so substituting it one-for-one in a recipe written for AP gives you a stiffer dough than intended. Add about 5 to 10 g of water per 100 g of flour and the dough will feel right. Bread flour vs all-purpose has the full comparison, and types of flour covers the rest.
Whole wheat is its own case. The bran physically cuts gluten strands as you knead, so a 100 percent whole wheat loaf is denser than a white one no matter how well you handle it. That's the flour, not your technique. Most bakers blend it, using 30 to 50 percent whole wheat with bread flour, which keeps most of the flavor and most of the rise.
Oven spring: the last chance to save the loaf
A surprising amount of a loaf's final height happens in the first ten minutes of baking. Yeast goes into a final burst as it warms, trapped gas expands, and water turns to steam. That's oven spring, and losing it turns a decent dough into a dense loaf at the last possible moment.
A cold oven kills it
Most home ovens beep well before they're actually ready. The thermostat is reading air temperature, but the oven walls, the rack, and any stone or steel inside are still cold, and they're what actually cooks the bread.
Give it 30 to 45 minutes of preheat, not the 10 to 15 minutes the beep suggests, and longer if you're heating a baking stone or a Dutch oven. An oven thermometer is inexpensive and worth it, because home ovens routinely run 25 to 50°F off their dial. Our oven temperature converter handles Fahrenheit, Celsius and gas mark if your recipe came from elsewhere.
Bread wants heat that hits hard and early. A loaf that goes into a lukewarm oven warms slowly, the crust sets before the interior has finished expanding, and you get a shorter, denser loaf.
Missing steam sets the crust too soon
Steam in the first ten minutes keeps the crust soft and stretchy so the loaf can keep expanding. Without it, the surface dries and hardens early and physically caps the rise.
Three ways to get it:
- Bake in a covered Dutch oven for the first 20 minutes. The dough's own moisture is trapped inside. This is the easiest and most reliable method by a wide margin.
- Pour a cup of boiling water into a preheated metal pan on the bottom rack as the bread goes in. Don't use glass, and stand back.
- Cover the loaf with an inverted metal bowl or roasting pan for the first 15 minutes.
Remove the cover or vent the steam after 15 to 20 minutes so the crust can dry, brown and crisp.
Underbaking is not the same as dense, but it feels the same
A loaf pulled too early has a wet, heavy, gummy center that reads exactly like dense bread. Check the internal temperature instead of the clock: 200 to 210°F for lean bread, 190 to 200°F for enriched doughs with milk, butter or eggs.
Then let it cool. Bread continues cooking as it cools, and the starches finish setting as the internal temperature drops. Cutting a hot loaf compresses the still-soft crumb and gives you a gummy slice from a perfectly good loaf. Two hours minimum for a standard loaf. How to tell when bread is done covers every doneness check.
Frequently asked questions
Why is my bread dense but it rose fine?
If the rise looked good, the problem happened after it. The usual suspects are over-proofing (it peaked and collapsed before it hit the oven), a cold oven that didn't deliver oven spring, or slicing it warm so the crumb compressed. Check the loaf with a thermometer for 200 to 210°F, and cool it completely before cutting.
Can I fix dense bread after it's baked?
Not really as a loaf, but it doesn't have to be wasted. Dense bread makes excellent toast, French toast, croutons, bread pudding and breadcrumbs, because the tight crumb holds up to liquid and heat better than an airy one. Slice it thin, since thin slices hide density well.
Why is my whole wheat bread so dense?
Bran cuts gluten strands as you work the dough, so 100 percent whole wheat is inherently denser than white bread. Whole wheat also absorbs more water, so a recipe converted from white flour ends up dry unless you add liquid. Try 30 to 50 percent whole wheat blended with bread flour, add about 10 percent more water, and give the dough a 30 minute rest before kneading.
How long should I knead bread dough by hand?
Eight to twelve minutes of steady work for a standard lean dough, but the timer isn't the answer. Test with the windowpane: a golf-ball piece should stretch thin enough to see light through before it tears. Enriched and whole grain doughs won't windowpane as cleanly, so judge those on a smooth surface and good spring-back instead.
Does old flour make bread dense?
It can. Whole grain flours contain oil that goes rancid within a few months at room temperature, which affects flavor more than rise, but very old flour also loses some enzyme activity. White flour keeps a year in the pantry and longer in the freezer. If the flour smells sharp, musty or crayon-like, replace it.
Why did my bread rise then collapse in the oven?
Over-proofing is the leading cause. The gluten stretched past what it could hold, and the structure gave way as soon as the gas expanded in the heat. Too much yeast produces the same result faster. Use the poke test rather than the clock, and if the dent stays put when you press the dough, get it in the oven immediately.
Is a dense crumb ever the correct result?
Yes, for several styles. Rye breads, pumpernickel, bagels, and traditional dense whole grain loaves are all supposed to be tight and heavy, and an open airy crumb would be wrong for them. The tell is the recipe: low hydration, high rye or whole grain content, and a long slow bake usually means density is the goal.
Should I use bread flour instead of all-purpose to fix dense bread?
It helps, but fix the measuring first. Bread flour's extra protein builds a stronger gluten network and holds gas better, which gives a taller loaf with a chewier crumb. It's a real improvement, not a fix for scooped flour or dead yeast. If you do switch, add about 5 to 10 g of extra water per 100 g of flour, since bread flour absorbs more.
Related guides: How to knead dough | How to measure flour | Bread flour vs all-purpose | How to proof yeast | How to tell when bread is done | Grams to cups converter