Why Are My Muffins Dry?

Almost always one of two things: too much flour, or too much mixing. Both are easy to fix and neither has anything to do with your recipe being bad.
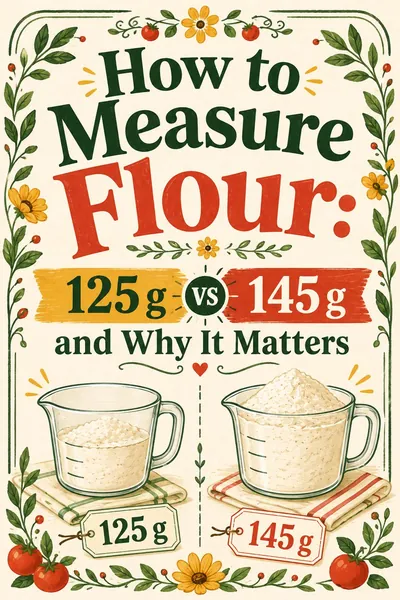
Too much flour usually comes from how you filled the measuring cup. Scooping the cup into the flour bag packs in about 145 g, while spooning it in and leveling gives you 125 g. On a 2-cup recipe that's 40 g of extra flour, roughly a third of a cup you never meant to add.
Too much mixing is the other half. Muffin batter should be stirred just until the dry streaks disappear, lumps and all. Keep going and the gluten tightens up, the crumb turns tough and dry, and you get tunnels running through the middle.
Stop guessing on the flour. Our free grams to cups converter turns any recipe's cup measures into grams so you get the same amount every time.
Updated August 2026
A note on numbers. This page gives you gram weights, ratios, oven temperatures and bake times, not dollar figures. Flour, pans and thermometers are priced by your retailer and your region, and we do not set any of it. Every number here is one you weigh or measure, not one you pay.
Why are my muffins dry? The 6 causes, ranked
| # | Cause | How common | Quick fix |
|---|---|---|---|
| 1 | Too much flour from scooping | Very common | Weigh it: 125 g per cup of all-purpose |
| 2 | Overmixed batter | Very common | Stir 10 to 15 strokes, leave lumps |
| 3 | Overbaked by 3 to 5 minutes | Common | Pull at moist crumbs, not clean toothpick |
| 4 | Oven running hot | Common | Buy an oven thermometer, the cheapest fix here |
| 5 | Not enough fat | Occasional | Don't cut the butter or oil below the recipe |
| 6 | Not enough sugar | Occasional | Sugar holds water, so cutting it dries the crumb |
The first two account for the large majority of dry muffins. Work down the list in order.
Cause 1: you're measuring flour heavy
This is the one nobody believes until they weigh a cup.
A cup isn't a fixed amount of flour. It's a fixed volume, and how much flour fits into that volume depends entirely on how compressed the flour is when it goes in.
| Method | Grams per cup of all-purpose | What it is |
|---|---|---|
| Sifted, then spooned | 115 g | Aerated, then transferred gently |
| Spoon and level | 125 g | Spoon flour into the cup, level with a knife |
| Scoop and sweep | 145 g | Dip the cup into the bag, sweep the top flat |
Most American recipe writers, and most cookbook test kitchens, work to 125 g per cup. If you're scooping, you're adding 16% more flour than the recipe intends on every single cup.
The math on a 2-cup muffin recipe
Take a standard 12-muffin recipe calling for 2 cups of all-purpose flour.
- What the writer meant: 2 × 125 g = 250 g
- What you get scooping: 2 × 145 g = 290 g
- The gap: 40 g of extra flour
40 g is about a third of a cup. That flour has to absorb liquid from somewhere, and the only liquid available is what was supposed to keep the crumb moist. The batter is stiffer, it holds less water after baking, and the muffin tastes dry even though you followed the recipe exactly.
Run it the other direction and it's worse. If the recipe was developed by someone who scooped (290 g) and you spoon and level (250 g), your batter is 40 g short and you get flat, greasy, oddly wet muffins instead.
That's the whole argument for a scale. How to measure flour walks through the spoon-and-level method properly if you don't have one yet.
Also check what flour you're using. Bread flour is 127 g per cup and has more protein, which makes muffins chewier and drier. Cake flour is 114 g per cup and much softer. Swapping them by volume without adjusting is a fast route to a dry muffin.
Cause 2: you mixed it too much
Muffins use the muffin method, which exists specifically to keep mixing to a minimum.
- Whisk all the dry ingredients together in a big bowl.
- Whisk all the wet ingredients together in a separate bowl, fat included.
- Pour the wet into the dry all at once.
- Fold with a spatula, 10 to 15 strokes, until you can't see dry flour.
- Stop. The batter should look lumpy and slightly shaggy. That's correct.
Step 5 is where people go wrong, because a lumpy batter looks unfinished and the instinct is to keep going until it's smooth.
Here's why you shouldn't. Flour contains glutenin and gliadin, two proteins that link into gluten strands as soon as they're wet and moved around. Gluten is what you want in bread. In a muffin it makes the crumb springy, chewy and tight, and a tight crumb squeezes out moisture as it bakes. The result reads as dry on the tongue even when the muffin technically has plenty of water in it.
Tunnels are the diagnostic sign
Cut an overmixed muffin in half. You'll see long, narrow vertical channels running from the base toward the top, like someone pushed a skewer through it in several places.
Those tunnels are the fingerprint of overmixing, and they're proof, not a guess. The developed gluten forms an elastic network that's too strong to stretch evenly. When the leavening gas expands, it can't inflate the batter uniformly, so it forces its way up through the path of least resistance and carves a channel.
A properly mixed muffin has an even, slightly open crumb with rounded holes of different sizes and no channels at all.
Other overmixing signs, in the order they show up: - The dome peaks sharply instead of rounding - The surface is smooth and shiny rather than slightly craggy - The muffin is noticeably springy when you press it - Tunnels
If you're seeing tunnels, cut your mixing in half. There's no downside. Small pockets of unmixed flour hydrate during the rest and the bake, and a few lumps in the raw batter never show up in the finished muffin.
Cause 3: overbaking, and the three-minute window
Muffins go from perfect to dry faster than almost anything else you bake, and the reason is geometry. A muffin is small and mostly crust. The ratio of surface area to volume is high, so once the center is set, moisture starts leaving quickly through a lot of exposed surface.
In practice that window is about three minutes wide. A muffin at 20 minutes can be moist and a muffin at 23 minutes can be noticeably dry, from the same tray.
The toothpick test, done right
The advice to bake until a toothpick comes out clean is wrong for muffins.
Pull them when a toothpick comes out with a few moist crumbs clinging to it. Not batter, not wet streaks, just crumbs that stick.
By the time a toothpick comes out bone dry and shiny, the center has already passed the point where it holds water, and carryover heat in the pan will take it further after it leaves the oven. Muffins keep cooking for two or three minutes in a hot metal tin, which is why you should lift them out onto a rack right away rather than leaving them to sit.
Timing guidance
| Muffin size | Oven | Typical time | Start checking at |
|---|---|---|---|
| Mini (24-cup pan) | 375°F | 10 to 13 min | 9 min |
| Standard (12-cup pan) | 375°F | 18 to 22 min | 16 min |
| Standard, high-dome start | 425°F for 5 min, then 350°F | 16 to 20 min total | 14 min |
| Jumbo (6-cup pan) | 375°F | 24 to 30 min | 21 min |
Treat those as ranges, not promises. Pan color, batter temperature and how full you fill the cups all shift them. Our baking time calculator adjusts a recipe's time when you change pan size or muffin count, which is the usual reason a stated time stops applying.
Cause 4: your oven runs hot
Home ovens are frequently off by 25 to 50°F, and some swing further than that as the element cycles. If yours runs 40°F hot, a 375°F muffin bakes at 415°F, sets its crust early, and dries out before the timer goes.
Buy an oven thermometer. It is the cheapest thing on any baking equipment list and the highest-value piece you can own.
Signs your oven runs hot: - Muffins brown well before they're cooked through - Domes crack hard and the sides pull away from the liner - Everything you bake finishes 3 to 5 minutes early - Edges are dark, centers are pale
Signs it runs cool: - Pale tops even at full time - Flat, spread-out muffin tops with no lift - Everything takes longer than stated
Recipes written in Celsius or gas marks are another source of error. 350°F is 177°C and gas mark 4, and rounding 177 up to 180°C is fine while rounding to 200°C is not. Our oven temperature converter handles the conversion, and it's worth checking any recipe you've pulled from a British or Australian site.
Also, if you're using convection, drop the recipe temperature by 25°F. Convection moves air across the surface, which dries muffins faster at the same dial setting.
Cause 5 and 6: fat and sugar are tenderizers, not just flavor
Cutting fat and sugar to make muffins healthier works, but you should know what you're spending.
Fat coats flour proteins and physically blocks gluten from forming. That's what "shortening" means as a verb: it shortens gluten strands. Butter at 227 g per cup and oil both do this, though oil does it more effectively because it's liquid at room temperature and spreads through the batter more completely. That's why oil-based muffins usually stay moist longer than butter-based ones.
Cut the fat by a third and you get a tougher, drier crumb, plus faster staling.
Sugar is hygroscopic, meaning it holds onto water. Granulated sugar at 200 g per cup and packed brown sugar at 213 g per cup both bind free water in the crumb and keep it there for days. Brown sugar does it better because of the molasses.
Cut the sugar by a third and you lose moisture retention, browning and tenderness at the same time. The muffin will be drier on day one and much drier on day two.
Sensible adjustments if you want to reduce them anyway: - Cut by 25%, not 50%, and see how it goes - Swap a quarter of the fat for full-fat yogurt or sour cream, which adds moisture and a little acid - Move some granulated sugar to brown sugar rather than cutting the total - Add a mashed banana or applesauce to replace some fat, accepting a denser crumb
Check the ingredient weights chart before you start substituting so you're trading equal weights, not equal cups.
The muffin diagnostic table
| Symptom | Most likely cause | Fix |
|---|---|---|
| Dry and crumbly, falls apart | Too much flour, or not enough fat | Weigh flour at 125 g/cup, keep the full fat |
| Tough and chewy, springs back | Overmixing, or bread flour instead of AP | Stir 10 to 15 strokes only, check your flour type |
| Tunnels through the crumb | Overmixing, confirmed | Halve the mixing, lumps are fine |
| Dry but the crumb looks fine | Overbaked by 2 to 4 minutes | Pull at moist crumbs, remove from pan immediately |
| Pale, no color, still dry | Oven running cool, or sugar cut too far | Oven thermometer, restore the sugar |
| Domed and cracked but raw inside | Oven running hot, or cups overfilled | Drop 25°F, fill cups two-thirds full |
| Flat tops, greasy | Too little flour, or too much fat | Weigh the flour, check for a scoop-vs-spoon mismatch |
| Moist on day one, dry on day two | Not enough sugar or fat, or bad storage | Restore sugar, store airtight at room temperature |
Worked example: fixing a dry muffin recipe
A reader's blueberry muffin recipe calls for 2 cups flour, 1 cup sugar, 1/2 cup butter, 2 eggs, 1 cup milk. Muffins come out dry and slightly tough with faint tunnels.
Convert it to weights first:
| Ingredient | Recipe says | Intended weight | What scooping gave |
|---|---|---|---|
| All-purpose flour | 2 cups | 250 g | 290 g |
| Granulated sugar | 1 cup | 200 g | 200 g |
| Butter | 1/2 cup | 113 g (1 stick) | 113 g |
| Large eggs | 2 | about 100 g | 100 g |
| Milk | 1 cup | about 240 g | 240 g |
Sugar and butter don't compress the way flour does, so those are fine. The flour is the only variable, and it's 40 g heavy, which is 16%.
The fix is two changes, and you make them together: 1. Weigh the flour to 250 g. That alone puts 40 g of liquid back into service as moisture instead of hydration for excess flour. 2. Fold 12 strokes and stop, even though the batter still has lumps.
Bake at 375°F, start checking at 16 minutes, pull at moist crumbs. If they're still not right after that, the third change is an oven thermometer.
Cake going wrong in the other direction? Why did my cake sink covers the collapse failures, which have almost the opposite set of causes.
Frequently asked questions
Can you overmix muffin batter?
Yes, and it's the second most common reason muffins turn out dry. Stirring past the point where dry flour disappears develops gluten, which tightens the crumb and squeezes moisture out during baking. Fold 10 to 15 strokes and leave the lumps.
What are the tunnels in my muffins?
They're vertical channels carved by leavening gas that couldn't expand evenly through an overdeveloped gluten network. Tunnels are the clearest single sign of overmixing, and the fix is simply to stir less.
How full should I fill muffin cups?
Two-thirds full for a rounded top, or right to the rim for a bakery-style overhanging dome. Filling past the rim without a high-heat start usually gives you spread rather than height, and it bakes unevenly.
Does oil make moister muffins than butter?
Generally yes. Oil is liquid at room temperature so it coats flour proteins more completely and blocks gluten better, and it doesn't firm up as the muffin cools. Butter tastes better, so plenty of recipes use both.
How long do muffins stay moist?
Two days at room temperature in an airtight container, once fully cooled. Refrigeration dries them faster because of starch retrogradation, so freeze them instead if you need longer, and warm from frozen.
Should the toothpick come out clean for muffins?
No. Pull them when the toothpick has a few moist crumbs on it. A completely clean toothpick means the center has already dried, and carryover heat in the pan will take it further.
Why are my muffins dry but the outside looks perfect?
That's the overbaking signature, usually combined with an oven running hot. The exterior sets and colors on schedule while the interior keeps losing moisture. Check your oven with a thermometer and pull three minutes earlier.
Can I fix muffins that already came out dry?
Not really, but you can make them pleasant. Split and toast them with butter, or brush the tops with a thin sugar syrup while they're still warm and cover them for ten minutes. The real fix belongs to the next batch.
Related guides: Grams to cups converter | How to measure flour | Baking time calculator | Oven temperature converter | Why did my cake sink | Ingredient weights chart