Active Dry vs Instant Yeast: The Difference and the Swap

They're the same species of yeast, Saccharomyces cerevisiae, dried two different ways. Instant yeast is milled into smaller granules and dried faster, so it rehydrates on contact and can be whisked straight into your dry ingredients. Active dry yeast has bigger, tougher granules that were traditionally dissolved in warm liquid first.
To swap instant for active dry, use about 25% less. Going the other way, active dry for instant, use about 25% more. Everything else in the recipe stays the same.
Need the number for an odd amount? Our free yeast converter does both directions by teaspoon and by gram.
Updated August 2026
Active dry vs instant yeast: what's actually different
Both start life in the same fermentation tank. The difference is what happens after harvest.
Active dry yeast is dried slowly at a higher temperature. That process kills off the outer layer of cells, which forms a protective shell around the living cells inside. The shell is why the granules are coarse and beige and why bakers historically dissolved them first. It's also why active dry has a small population of dead cells releasing glutathione, a compound that slightly relaxes gluten.
Instant yeast is dried fast under vacuum at a lower temperature, then milled fine. Almost no cells die. The granules are smaller, paler, and porous, so water reaches the living cells the moment the dough comes together. More live cells per gram is exactly why you need less of it.
That's the whole story. Same organism, same flavor potential, different packaging of the same power.
You'll see instant yeast sold under a pile of names: instant, rapid-rise, quick-rise, fast-acting, bread machine yeast, and instant dry yeast (IDY). They are all the same product category. Rapid-rise versions sometimes add ascorbic acid and enzymes to push the rise even faster, which is great for a one-hour loaf and less great for flavor.
Yeast conversion chart, both directions
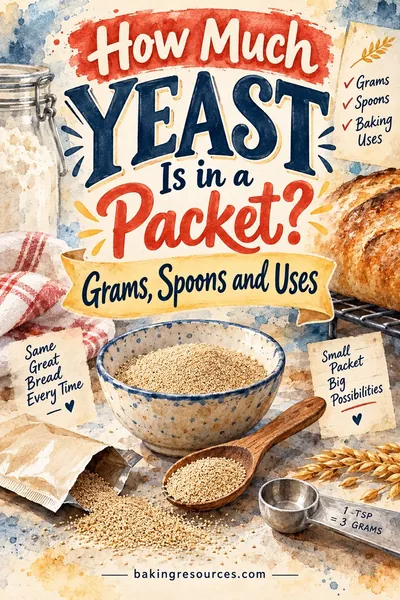
Standard weights used here: 1 teaspoon of either yeast is about 3.1 g, and the standard US packet is 2 1/4 teaspoons = 7 g = 1/4 oz. Yes, both yeasts weigh about the same per spoon. The difference is how many live cells are in that spoon.
Active dry to instant (use 25% less)
| Recipe calls for (active dry) | Grams | Use this much instant | Grams |
|---|---|---|---|
| 1 tsp | 3.1 g | 3/4 tsp | 2.3 g |
| 1 1/4 tsp | 3.9 g | 1 scant tsp | 2.9 g |
| 2 1/4 tsp (1 packet) | 7 g | 1 3/4 tsp | 5.25 g |
| 1 tbsp (3 tsp) | 9.3 g | 2 1/4 tsp | 7 g |
| 2 tbsp | 18.6 g | 1 tbsp + 1 1/2 tsp | 14 g |
Instant to active dry (use 25% more)
| Recipe calls for (instant) | Grams | Use this much active dry | Grams |
|---|---|---|---|
| 1 tsp | 3.1 g | 1 1/4 tsp | 3.9 g |
| 1 1/4 tsp | 3.9 g | 1 1/2 tsp + a pinch | 4.8 g |
| 2 1/4 tsp (1 packet) | 7 g | 2 3/4 tsp | 8.75 g |
| 1 tbsp (3 tsp) | 9.3 g | 1 tbsp + 3/4 tsp | 11.6 g |
| 2 tbsp | 18.6 g | 2 tbsp + 1 1/2 tsp | 23.3 g |
Two honest notes on this chart.
First, at home amounts the difference is often tiny. Swapping a packet of active dry for a packet of instant, straight across with no math, will still give you bread. It'll rise a little faster and taste a hair less developed. Nothing is ruined.
Second, weighing beats spooning. A teaspoon of yeast can land anywhere from 2.8 to 3.4 g depending on how you scoop, which is a 20% swing before you've even started converting. If you own a scale, use grams. Our ingredient weights chart lists yeast alongside flour, sugar, and everything else you'd measure by volume.
Do you still need to proof active dry yeast?
Short version: no, not anymore, and this is the single most out-of-date instruction in home baking.
Modern active dry yeast is milled finer than the stuff your grandmother used. Fleischmann's, Red Star, and SAF all now state that their active dry yeast can be added directly to dry ingredients. The granules hydrate fine inside a normal dough.
So why does every recipe still say to dissolve it? Because recipes get copied. The instruction was necessary in the 1970s and it stuck around.
Proofing is now a freshness test, not a required step. That's a genuinely useful thing to have. If your jar has been open since last winter and you're about to commit six cups of flour and three hours, spending ten minutes confirming the yeast is alive is smart.
How to proof yeast properly
- Measure 1/4 cup of water at 110 to 115°F. Use a thermometer the first few times. Wrist-testing is how people kill yeast.
- Stir in a pinch of sugar, about 1/4 teaspoon. The sugar is food, not flavor.
- Sprinkle the yeast on top and stir once.
- Wait 5 to 10 minutes. You want a foamy, domed, slightly beery-smelling head on the water.
Foam means alive. Flat, cloudy water after 10 minutes means dead, and you should throw it out rather than hope.
If you proof, remember to subtract that 1/4 cup from the recipe's other liquid.
The temperatures that kill yeast
This matters more than any other number in this article.
| Water temperature | What happens |
|---|---|
| Below 70°F | Yeast wakes slowly. Fine, just slow |
| 90 to 100°F | Comfortable and active |
| 105 to 115°F | The proofing sweet spot for dissolving yeast |
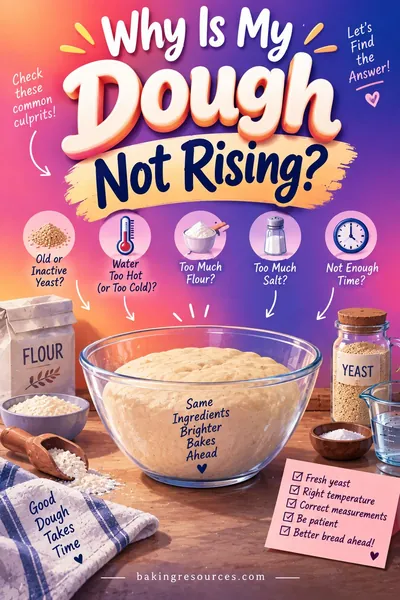
| Above 120°F | Cell damage begins, and you lose activity |
| 130°F and above | Yeast dies outright |
One exception worth knowing. Rapid-rise and instant packets often tell you to use liquid at 120 to 130°F. That instruction only applies when the yeast is already whisked into the flour. The flour buffers the heat and the temperature drops instantly on contact. Never pour 125°F water onto bare yeast.
Yeast type comparison chart
| Type | Granule size | How to use | Substitution ratio | Shelf life | Notes |
|---|---|---|---|---|---|
| Active dry | Coarse, beige | Mix into dry ingredients, or dissolve in 110 to 115°F water | Baseline (1x) | 2 yrs sealed; 4 mo opened, fridge | The classic. Slightly slower first rise |
| Instant / rapid-rise / bread machine | Fine, pale | Whisk straight into dry ingredients. Never needs dissolving | Use 0.75x active dry | 2 yrs sealed; 4 to 6 mo opened, fridge | Rapid-rise adds enzymes for speed. Same yeast |
| Fresh / cake yeast | Moist crumbly block | Crumble into liquid or rub into flour | Use about 3x instant by weight | 2 weeks refrigerated | Best aroma, worst shelf life. Rarely stocked in US stores |
| Osmotolerant (SAF Gold) | Fine, pale | Same as instant, straight into dry | Same as instant (1:1) | Same as instant | Built for sweet doughs above 10% sugar |
| Sourdough starter | Wet flour paste | Different method entirely | Not a swap | Indefinite if fed | Wild yeast plus bacteria. See below |
The fresh yeast ratio, explained plainly
Old-school bakers memorize it as 1:2:3. One part instant, two parts active dry, three parts fresh, by weight.
Treat the middle number as a rough memory hook rather than gospel. Manufacturer conversions put active dry closer to 1.25 times instant, not 2 times. The 1:3 relationship is the reliable half: 1 g of instant yeast does the work of about 3 g of fresh yeast.
Real numbers: a 0.6 oz cake of fresh yeast (17 g) replaces one 7 g packet of active dry, or about 5.25 g of instant.
Why osmotolerant yeast exists
In a dough with a lot of sugar, the sugar pulls water out of the yeast cells by osmosis. Ordinary yeast gets dehydrated and sluggish, and your brioche or cinnamon roll dough crawls.
Osmotolerant strains handle that pressure. If your dough has more than about 10% sugar by flour weight, this is the yeast that fixes the "why won't it rise" problem. Below 10%, regular instant is fine.
Sourdough starter is a different animal
A starter isn't concentrated yeast. It's a living culture of wild yeast plus lactic acid bacteria, and the bacteria are half the point. They make the sour notes and the keeping quality. There's no clean teaspoon-for-teaspoon conversion, because you're also adding flour and water in the starter. Swapping between commercial yeast and starter means rewriting the recipe's hydration, not just the leavening line. Our walkthrough on converting a yeast recipe to sourdough does that rewrite step by step.
Temperature governs everything else
Yeast quantity gets all the attention. Temperature does more of the work.
Target a final dough temperature of 75 to 78°F. That's the dough itself, measured with an instant-read thermometer right after mixing. In that range you get steady, predictable fermentation with good flavor. Bakeries hit it deliberately by adjusting water temperature to compensate for flour temperature and friction from the mixer.
What cold does
Cold slows fermentation. That is a tool, not a problem.
In a 38 to 40°F refrigerator, yeast activity drops close to a crawl. But the enzymes in the flour keep working. They break starch into simple sugars and protein into amino acids, and those are the raw material for flavor and for browning. Give a dough 24 to 72 hours in the fridge and you get a depth of flavor you cannot buy with more yeast.
This is why overnight cold fermentation is the single biggest upgrade available to a home baker. It costs nothing but a shelf.
A cold dough also handles better. It's firmer, less sticky, and much easier to shape.
What heat does
Above about 80°F, yeast races. You get volume fast and flavor never develops. Above 90°F the yeast starts producing off-flavors, and the dough can overproof and collapse before you notice.
Warm kitchens in July are the reason a recipe that worked in January suddenly gives you a sour, boozy, flat loaf. Cut the yeast by a third and check the dough an hour earlier than the recipe says.
Pizza dough: yeast quantity trades against time
Pizza is where this all becomes obvious, because pizza dough is basically flour, water, salt, and a decision about time.
Yeast in bread doughs is measured in baker's percentage: the weight of yeast as a percentage of the flour weight. Not of the total dough, just the flour.
| Fermentation plan | Instant yeast (baker's %) | For 500 g flour | Flavor |
|---|---|---|---|
| 1 1/2 to 2 hrs, room temp | 0.75 to 1% | 3.75 to 5 g (1 1/4 to 1 2/3 tsp) | Bready, plain, fine |
| 4 to 6 hrs, room temp | 0.3 to 0.5% | 1.5 to 2.5 g (1/2 to 3/4 tsp) | Better |
| 24 hrs, cold | 0.1 to 0.25% | 0.5 to 1.25 g (about 1/4 tsp) | Noticeably good |
| 48 to 72 hrs, cold | 0.05 to 0.1% | 0.25 to 0.5 g (a scant 1/8 tsp) | The best you'll make at home |
Multiply those instant numbers by 1.25 if you're using active dry yeast for pizza dough instead.
Look at the last row. A 72-hour dough uses roughly one twentieth of the yeast of a two-hour dough. Same rise, same volume, wildly different flavor, because the yeast and the flour enzymes had three days to work instead of two hours.
If you're making pizza dough using instant yeast, the practical recipe is boring and effective: 500 g flour, 325 g water (65% hydration), 10 g salt (2%), 1 g instant yeast (0.2%). Mix, rest 30 minutes at room temperature, divide into three balls, refrigerate 24 to 48 hours, pull out 2 hours before baking.
Measuring 1 g of yeast needs a scale that reads to 0.1 g. They are inexpensive and they're the difference between guessing and knowing.
Salt and sugar change how yeast behaves
Salt slows yeast down, and that's mostly good. It tightens the gluten network, controls the rate of fermentation, and stops the dough from blowing up and collapsing. Standard bread dough runs 1.8 to 2.2% salt by flour weight. A salt-free dough rises fast, tastes like paste, and tears.
The bowl rule: don't dump salt directly on top of yeast and let it sit. Salt is hygroscopic, and prolonged direct contact draws water out of the yeast cells and damages them. Put them on opposite sides of the flour bowl and whisk the dry ingredients together before the water goes in. Brief contact during mixing is completely fine. The internet has turned this into more of a rule than it deserves, but the cheap fix costs nothing.
Sugar cuts both ways. Up to about 5% of flour weight, sugar is food and speeds fermentation up. Past about 10%, osmotic pressure starts pulling water out of the yeast and slows it down. Past 15% you'll be waiting all afternoon unless you use osmotolerant yeast or simply add more regular yeast to compensate.
This is the same chemistry that governs chemical leaveners in cakes, just with a living organism instead of a reaction. If you're working with the other kind of lift, our baking powder substitute guide covers those ratios, and replacing yeast with baking powder covers what changes when you swap one family for the other.
Storage and shelf life
Yeast is alive, and everything about storage is about keeping it dormant instead of slowly dying.
| Storage | Active dry | Instant | Fresh |
|---|---|---|---|
| Unopened, cool pantry | Until the printed date, usually 2 yrs | Until the printed date, usually 2 yrs | Not applicable |
| Opened, pantry | 2 to 4 months | 2 to 4 months | No |
| Opened, refrigerated airtight | 4 months | 4 to 6 months | 2 weeks |
| Frozen airtight | 6 to 12 months, often longer | 6 to 12 months, often longer | Not recommended |
Freezing is the correct way to store bulk yeast. If you bought a 1 lb brick because it costs a fraction of what packets cost, decant it into a small jar for the fridge and put the rest in a zip bag in the freezer. Press the air out. Dry yeast has so little moisture that ice crystals don't form and damage cells, which is exactly why the same trick fails with fresh yeast.
You can use instant yeast straight from the freezer if it's going into dry ingredients. If you're proofing it, let it come to room temperature first so you don't crash the water temperature.
How to tell if yeast is dead
Proof a teaspoon in 1/4 cup of 110°F water with a pinch of sugar. Foam in 10 minutes means alive.
Partial foam, or foam that takes 20 minutes, means weakened yeast. It'll still work if you add about 25% more and give the dough extra time, but replace it soon.
Age isn't reliable on its own. Yeast stored on a hot shelf above the stove can die in months. Yeast in the freezer often outlives its printed date by a year.
Worked example: converting one packet
Here's the exact math on the most common situation.
Your recipe says: 1 packet active dry yeast, dissolved in 1/4 cup of the warm water, for a sandwich loaf. You have: a jar of instant.
Step 1, the amount. One packet is 2 1/4 tsp, or 7 g.
By weight: 7 g x 0.75 = 5.25 g of instant.
By volume: 2.25 tsp x 0.75 = 1.69 tsp, which is 1 3/4 teaspoons in real kitchen terms. That's 1 1/2 tsp plus 1/4 tsp.
Step 2, the method. Skip the dissolving step entirely. Whisk the 1 3/4 tsp of instant into the flour with the salt and sugar. Then add all of the water at once, including the 1/4 cup that would have gone into the proofing bowl. Water temperature can be a comfortable 90 to 100°F.
Step 3, the timing. This is the part recipes don't warn you about. Instant yeast has more live cells and a head start, so it typically runs 10 to 20% faster on the first rise. If the recipe says "until doubled, about 90 minutes," start checking at 70 minutes.
Use the poke test, not the clock. Flour a finger, press half an inch into the dough, and pull out. If the dent springs back slowly and only partway, it's ready. If it springs back fast, give it more time. If it doesn't spring back at all, you've gone too far.
The result: the same loaf, about 15 minutes sooner, with one less bowl to wash. The flavor difference is real but small. If you want the flavor back, cut the yeast to 1 1/4 tsp and let the first rise go long and cool.
The flour you use matters just as much as the yeast, and the protein difference shows up in exactly the same way. Our guide to bread flour vs all-purpose walks through when the swap changes your result and when it doesn't.
Frequently asked questions
Can I substitute instant yeast for active dry?
Yes, in any recipe, with no other changes. Use about 25% less instant than the active dry called for, so 1 3/4 tsp of instant replaces a 2 1/4 tsp packet of active dry. Skip the dissolving step and whisk it into the dry ingredients instead, then check the dough 10 to 20 minutes earlier than the recipe says.
Is active dry yeast the same as instant yeast?
Same species, different processing. Instant is dried faster and milled finer, so it has more live cells per gram and hydrates instantly. Active dry has coarser granules with a protective shell of dead cells. In a finished loaf, most people can't tell them apart.
Can I use active dry yeast for pizza dough?
Absolutely, and plenty of great pizzerias do. Use 25% more than the instant amount, so 0.25% baker's percentage instead of 0.2%. If you're doing a long cold ferment, dissolve the active dry in a little of the recipe water first, since a 48-hour cold dough gives coarse granules less warm time to fully hydrate.
What happens if I use too much yeast?
The dough rises fast, then overproofs and collapses, and the bread tastes yeasty and slightly boozy with a coarse open crumb. It also stales faster. Too much yeast is a much more common home-baking mistake than too little, especially in warm kitchens.
Do I have to proof instant yeast?
No, never. Instant yeast is designed to go straight into dry ingredients, and dissolving it first gains you nothing. The only reason to proof it is to test whether an old jar is still alive.
What water temperature kills yeast?
Damage starts above about 120°F and yeast dies outright at 130°F and up. For dissolving yeast, stay between 105 and 115°F. The 120 to 130°F instruction on rapid-rise packets applies only when the yeast is already mixed into the flour, which buffers the heat.
How much instant yeast is in a packet?
A standard US packet holds 2 1/4 teaspoons, which is 7 g or 1/4 oz, and that's true for both active dry and instant. One packet leavens up to about 4 cups of flour in a standard recipe. For long cold ferments you'll use far less than a full packet.
Can I freeze yeast?
Yes, and you should if you buy in bulk. Dry yeast frozen in an airtight bag stays viable for a year or more, often well past its printed date. Fresh cake yeast is the exception, since freezing ruptures the cells in the moist block.
Related guides: Bread flour vs all-purpose | Baking powder substitute | Ingredient weights chart | Yeast converter tool