What Is a Springform Pan?

A springform pan is a round baking pan in two pieces: a flat base and a tall side wall with a spring latch. Close the latch and the wall clamps tight around the base. Open it and the wall expands and lifts away, leaving your cake sitting on the base. You never have to turn the pan over, which is the entire point.
That matters for anything too soft, too wet or too delicate to survive being flipped. Cheesecake, flourless chocolate cake, mousse cakes, ice cream cakes, deep tortes and no-bake desserts all come out of a springform intact and would be destroyed by the usual invert-and-tap routine.
Springform pans are also deeper than standard cake pans, which surprises people the first time they swap one in. A 9 inch springform holds about 12 cups against 8 cups for a 9 inch round cake pan. Our free cake pan converter does that capacity math for any two pans so you never overfill or underfill again.
Updated September 2026
What is a springform pan made of, and how does the latch work?
The design has three parts.
The base is a flat metal disc, usually with a small raised lip around the outer edge. That lip sits in a groove on the inside of the wall and helps form the seal.
The wall is a tall metal band, typically 2 3/4 to 3 inches high, hinged at one point and open at the latch.
The latch is a lever that pulls the two ends of the band together. Closing it shrinks the band's circumference by a few millimeters, which is what clamps it down onto the base lip.
That is the whole mechanism. There's no locking bottom, no twist, no clips around the rim. One lever does everything.
| Part | Standard cake pan | Springform pan |
|---|---|---|
| Bottom | Welded, one piece | Separate disc, removable |
| Side | Fixed | Hinged band with a spring latch |
| Typical depth | 2 inches | 2.75 to 3 inches |
| Watertight | Yes | No, the seam can seep |
| Release method | Invert and tap | Unlatch and lift the ring |
That "no" in the watertight row is the one real weakness of the design, and everything in the leak section below exists because of it.
When to use a springform pan
Reach for one whenever the cake cannot be flipped.
Cheesecake. The classic use. A baked cheesecake is a custard, and a custard that has been turned upside down is a puddle. Springform pans and cheesecake are effectively a matched set, and most American cheesecake recipes are written for the 9 inch.
Flourless chocolate cake and dense tortes. Very little structure, very fragile edges, and often a crackly top you don't want to press against a plate.
Ice cream cakes and semifreddo. Frozen desserts release cleanly when you warm the outside of the ring for a few seconds with your hands or a hot towel.
No-bake and chilled desserts. Anything set with gelatin, anything built in layers, anything with a crumb crust pressed in the bottom. For a cookie base, how many Oreos make a cup of crumbs saves you weighing a packet at a time.
Deep dish everything. The extra height handles a deep quiche, a deep dish pizza, or a tall layered mousse cake that would overflow a 2 inch pan.
Cakes with a decorative top. A streusel top, a fruit top, an upside down arrangement you want to stay put. No flipping means no damage.
When to use something else
Thin, runny batters. A loose cake batter finds the seam and drips onto your oven floor. Standard butter cakes belong in a regular round pan.
Angel food and chiffon. These need to cool upside down while clinging to an ungreased tube pan wall. A springform defeats the whole method.
Anything you'd normally invert anyway. If the recipe is happy being turned out of a plain pan, use the plain pan. Fewer parts, no seam, easier cleanup.
Deep frying or stovetop use. The latch and hinge are not built for direct flame or for supporting weight from the side.
Our guide to round cake pan sizes covers the standard pans, and if you need to work around not owning a springform at all, what to use instead of a springform pan has five swaps that hold up.
Springform sizes and what they hold
Springforms are named by the diameter of the ring, measured across the top inside edge. The depth varies by maker, which is why two 9 inch pans can hold different amounts.
| Pan | Typical depth | Capacity, filled to the rim | Common use |
|---|---|---|---|
| 8 inch springform | 3 inches | About 10 cups | Small cheesecake, 8 to 10 servings |
| 9 inch springform | 2.75 inches | About 12 cups | The default American cheesecake size |
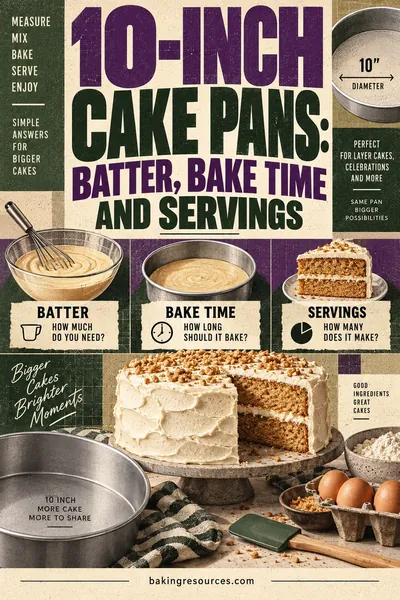
| 10 inch springform | 2.75 inches | About 15 cups | Party size, deep tortes |
Compare that to flat cake pans and the difference is stark. A 9 inch round cake pan 2 inches deep holds about 8 cups. The 9 inch springform holds about 12. That's 50 percent more volume at the same stated diameter, purely from the extra inch of height.
What this means in practice: a recipe written for two 9 inch round layers, roughly 16 cups of batter total, will not fit in one 9 inch springform. A cheesecake recipe written for a 9 inch springform will overflow a 9 inch cake pan badly.
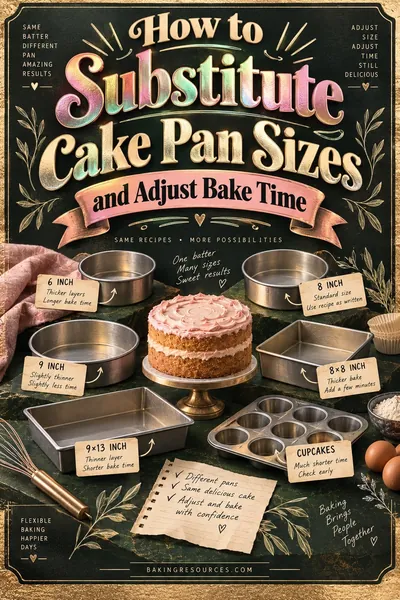
Our full springform pan sizes chart has the centimeter conversions and the swap math, and how to substitute cake pan sizes covers the time and temperature adjustments that go with any change of pan.
A worked example: moving a cheesecake from 9 inch to 10 inch
Say your recipe is built for a 9 inch springform and you only own the 10 inch.
Step 1: get the ratio. The 9 inch holds about 12 cups, the 10 inch about 15. That's 15 divided by 12, or 1.25. You need 25 percent more filling to reach the same depth.
Step 2: scale the recipe. Multiply every ingredient by 1.25. Three 8 oz blocks of cream cheese becomes 3.75 blocks, so round to 4 and accept a slightly taller cake. Four eggs becomes five.
Step 3: adjust the bake. More surface area and roughly the same depth means the timing barely moves. Keep the oven at 325°F and start checking 5 minutes earlier than the original recipe, not later, because the wider pan heats through from the edges faster.
Step 4: check by temperature, not by clock. A baked cheesecake is done when the center reads about 150°F and the middle 2 to 3 inches still wobble as a unit when you nudge the pan. It firms up completely as it chills.
If you don't scale up at all, your filling will sit shallow in the bigger pan, bake much faster, and probably crack. Either scale it or use the smaller pan.
Leak-proofing, and the water bath problem
A springform is not watertight. Butter melting out of a crumb crust will find the seam, and water from a bath will find it faster.
The seam leaks for three reasons: the base lip and the wall groove don't seal perfectly, the metal expands at different rates as it heats, and older pans warp so the base no longer sits flat.
The foil method. Two full sheets of heavy duty foil, at least 18 inches wide so there's no seam under the pan. Press each sheet up and around the outside, smoothing as you go, and fold the top edges over the rim. Two layers, crossed at right angles, not one. Standard width foil requires a seam somewhere under the base and that seam is exactly where water gets in.
The pan-in-a-pan method, which is better. Set the whole springform inside a slightly larger solid cake pan, a 10 inch round for a 9 inch springform, or inside a disposable foil roasting pan. No foil, no seam, no risk. This is the reliable version and it's what most people should use.
The oven bag method. Slide the springform into a large turkey sized oven bag and gather the top above the water line. Simple, effective, and it eliminates the seam entirely.
Setting up the bath: put the wrapped springform in a roasting pan, slide the rack out, pour boiling water into the roasting pan until it comes about halfway up the springform's side, then slide the rack back in carefully. Pouring after the pan is in the oven is safer than carrying a full roasting pan across the kitchen.
The bath is worth the trouble. It holds the oven's effective heat around the cake gentle and even, which is what stops the surface from setting hard and cracking as the center rises.
How to line and release a springform
Lining is easier than in a solid pan because you can take the base out.
- Unlatch the ring and lift it off.
- Lay a square of parchment flat over the base, then set the ring back on top and latch it. The parchment is now clamped in the seam, which doubles as a mild gasket.
- Tear off the excess around the outside, or leave a little sticking out to use as a handle later.
- Grease the ring, not the base. Butter or spray on the vertical wall only.
For a cheesecake, skip greasing the wall entirely. The batter needs to grip the sides on the way up, and a greased wall lets it slide back down and crack the surface. The full list of causes behind cheesecake cracking covers the rest.
To release: run a thin paring knife or a small offset spatula around the inside of the ring first, all the way to the bottom, then open the latch. Never open the latch first. If the cake is stuck anywhere, the expanding ring tears it as it moves.
For cheesecake specifically: chill it fully, at least 6 hours and preferably overnight, before you release. Warm cheesecake is soft enough to slump when the support disappears. Our guide to cooling a cake covers the staged cooling that prevents cracks, and why cakes stick to the pan has the rescue methods when something grips anyway. General lining technique is in how to line a cake pan.
Care, cleaning and what goes wrong
Hand wash it. Dishwasher detergent is harsh on the latch spring and on any nonstick coating, and repeated heat cycles loosen the hinge. Warm water, soap, soft cloth, dry immediately.
Dry the seam. Water trapped in the groove between the base lip and the wall causes rust on carbon steel pans and leaves spots on everything else. Separate the two pieces and dry them apart.
Store it latched or unlatched? Unlatched, with the base sitting inside the open ring, or stacked separately. Leaving the spring under tension for years slowly weakens it.
Check for warp once a year. Set the base on a flat counter and press each edge. Any rocking means it will leak, and no amount of foil fully compensates for a warped base.
Common problems
| Problem | Cause | Fix |
|---|---|---|
| Butter puddles under the pan | Crumb crust leaking through the seam | Bake on a rimmed sheet pan every time |
| Water in the crust | Foil seam or a torn wrap | Use the pan-in-a-pan method instead |
| Cake tears on release | Latch opened before running a knife around | Knife first, always |
| Latch won't close | Ring warped or base not seated in the groove | Reseat the base, press the ring down flat |
| Rust spots in the groove | Water trapped after washing | Separate and dry both pieces every wash |
| Cheesecake cracked down the middle | Overbaked, or wall was greased | Bake to 150°F center, leave the wall bare |
One habit that solves half of these: always put the springform on a rimmed baking sheet before it goes in the oven. It catches every drip, it makes the pan easier to move, and it takes no extra effort.
FAQ
What is a springform pan used for besides cheesecake?
Plenty. Flourless chocolate cake, ice cream cake, semifreddo, deep dish quiche and pizza, layered mousse cakes, no-bake icebox desserts, and any cake with a topping you don't want to flip onto a plate. The common thread is that the dessert can't survive being turned upside down.
Do springform pans always leak?
Not always, but assume they might. The base and ring meet at a seam that was never designed to be watertight, and even a good pan can seep melted butter from a crumb crust. Bake on a rimmed sheet pan, and use a solid outer pan rather than foil for any water bath.
Can I use a springform pan for regular cake batter?
You can, but there's rarely a reason to. Thin batters seep through the seam, and a normal butter cake turns out of a solid pan without any drama. Save the springform for things that can't be inverted.
What size springform pan should I buy first?
The 9 inch, holding about 12 cups. It's the size the vast majority of American cheesecake recipes are written for, so you'll be able to follow recipes without doing any conversion math. Add an 8 inch later if you bake for small groups.
How do I know when a cheesecake in a springform is done?
Check the center with an instant read thermometer and look for about 150°F. Visually, the outer 2 inches should look set and the middle 2 to 3 inches should still jiggle as one unit when you nudge the pan. It keeps setting as it cools, so pulling it while the center still moves is correct.
Should I grease the sides of a springform pan?
For cheesecake, no. The batter needs to climb and grip the wall as it bakes, and a greased wall lets it slip down and pull the top apart. For most other cakes, a light coat of butter on the ring makes release cleaner. Line the base with parchment either way.
Is a push pan the same thing?
Close, but not identical. A push pan has a solid one-piece side and a loose bottom that you push up from underneath. There's no latch and no hinge, so it seals better and leaks less, but it's harder to release something very soft since you're pushing the dessert upward rather than lifting the wall away.