How to Frost a Cake

Level the layers flat, fill and stack them, spread a thin crumb coat over the whole cake, chill it 20 to 30 minutes until that layer is firm to the touch, then apply the final coat. That's the whole method, and the crumb coat is the part beginners skip.
It's also the entire difference between a cake that looks homemade in a good way and one that looks like it lost a fight. The crumb coat glues every loose crumb down so they can't drag through your finish layer. Without it you're spreading frosting directly onto a torn, crumbly surface and the crumbs come with you.
The other rule that matters just as much: the frosting has to be the right temperature. Too warm and it slides off the sides. Too cold and it grabs the cake and tears chunks out.
Work out how much you actually need first with our free frosting calculator, because running short halfway through the final coat is the one mistake you can't undo.
Updated August 2026
How much frosting do you need before you start
Work this out before you preheat anything, because running short halfway through the final coat is the mistake in this whole process that you cannot walk back.
The number depends almost entirely on the sides, not the top, which is why flat charts that only look at diameter get tall cakes wrong. For a two layer 9 inch round, budget about 4 1/2 cups of American buttercream, close to 1,146 g. Drop to an 8 inch and you need about 3 3/4 to 4 cups. Go up to a 9 inch cake built from three layers instead of two and the number jumps to 6 3/4 cups, nearly 50 percent more, because the cake got taller and side area grows in step with height.
The chart: frosting by pan size
Every figure below covers a crumb coat, filling between the layers, a full outside coat, and a simple piped border. Grams are for American buttercream at 247 g per cup, the heaviest of the common frostings.
| Cake | Cups | Grams | Filling only |
|---|---|---|---|
| 6 in round, 2 layers | 2 1/2 | 639 g | 1/2 cup |
| 8 in round, 2 layers | 3 3/4 to 4 | 963 g | 3/4 cup |
| 9 in round, 2 layers | 4 1/2 to 4 3/4 | 1,146 g | 1 cup |
| 9 in round, 3 layers | 6 3/4 | 1,676 g | 2 cups |
| 10 in round, 2 layers | 5 1/2 | 1,344 g | 1 1/4 cups |
| 8 in square, 2 layers | 5 | 1,226 g | 1 cup |
| 9 x 13 sheet, top only | 2 1/2 | 600 g | none |
| 9 x 13 sheet, all over | 4 1/4 | 1,052 g | none |
| 12 cupcakes, knife spread | 1 1/2 | 370 g | none |
| 12 cupcakes, piped swirl | 3 | 741 g | none |
| 24 cupcakes, piped swirl | 6 | 1,482 g | none |
Two things in that table are worth a second look. The 9 inch three layer needs 6 3/4 cups even though nothing about the diameter changed, only the height. And cupcakes double outright: twelve spread flat with a knife take 1 1/2 cups, the same twelve piped into a tall bakery swirl take 3 cups. That single decision is the most common frosting miscalculation there is.
The math behind the chart
Frosting is a coating, so the honest way to size it is surface area multiplied by how thick that coat sits, converted to cups. Here is the model, worked through on a 9 inch two layer round with 2 inch layers.
Top area is pi times radius squared, so 3.1416 x 4.5 x 4.5 = 63.6 square inches.
Side area is circumference times height. Two layers at 2 inches each makes the cake 4 inches tall, so 3.1416 x 9 x 4 = 113.1 square inches.
That is the number that matters. The sides come to 113 square inches against 64 for the top, so almost two thirds of a layer cake's frosted surface is its sides. That is why height moves the total more than diameter does, and it is the same reason a torted cake with extra layers needs noticeably more than the layer count alone suggests.
Exposed area is 63.6 + 113.1 = 176.7 square inches. Multiply each job by its own thickness:
| Job | Thickness | Volume | Cups |
|---|---|---|---|
| Crumb coat | 0.05 in over 176.7 sq in | 8.8 cu in | 0.61 |
| Filling, 1 join | 0.22 in over 63.6 sq in | 14.0 cu in | 0.97 |
| Outside coat | 0.20 in over 176.7 sq in | 35.3 cu in | 2.45 |
| Simple border | 25% of the outside coat | 8.8 cu in | 0.61 |
| Total | 66.9 cu in | 4.64 |
A US cup is 14.44 cubic inches, so 66.9 divided by 14.44 comes to 4.64 cups, or 1,146 g of American buttercream at 247 g per cup. Change the diameter, the layer count or the layer thickness and you can rerun this by hand in a couple of minutes, or instantly with our frosting calculator.
Where every cup actually goes
The outside coat is half the total on its own, 2.45 cups out of 4.64 on a 9 inch cake. It is also the job you do last, which is why running short always happens at the worst possible moment.
Filling is smaller than most people think. One join between two layers takes about a cup on a 9 inch cake. Piling in twice that is exactly what pushes filling out the sides and causes the bulge described further down, which is why the dam in Step 2 matters.
The crumb coat is tiny, just over half a cup on a 9 inch cake, because it is supposed to be thin enough to see cake color through it. If you are using more than that, you are not crumb coating, you are doing the final coat twice.
Decoration is wide open. A simple shell border adds a quarter on top of the outside coat. Heavy piping or a full ruffle finish can add the whole outside coat again, which is the difference between 4 1/2 cups and 6 1/2 cups on the same cake.
Batch yields by frosting type
Knowing you need 4 1/2 cups only helps if you know what one batch actually makes.
| Frosting | Yield per batch | Grams per cup |
|---|---|---|
| American buttercream | 3 cups | 247 g |
| Swiss meringue buttercream | 3 1/2 cups | 199 g |
| Italian meringue buttercream | 4 cups | 189 g |
| Cream cheese frosting | 3 cups | 235 g |
| Stabilized whipped cream | 4 cups | 129 g |
| Ganache | varies by ratio | 265 g |
| Royal icing | 2 1/2 cups | 240 g |
| Rolled fondant | 2 1/2 cups | 320 g |
Fondant is the one on that list measured as a sheet rather than a scoop, and how much fondant to cover a cake gives the weight by pan size.
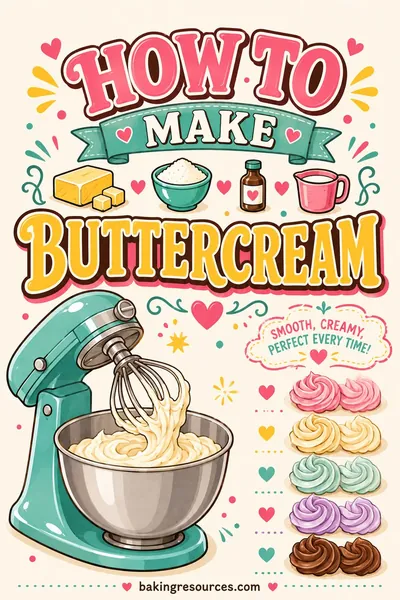
A standard American buttercream batch, 1 cup of butter and 4 cups of powdered sugar, yields about 3 cups. That comfortably covers a 6 inch or 8 inch two layer cake, falls short on a 9 inch one, and is nowhere near enough for a 9 inch three layer. For a 9 inch two layer, make one and a half batches. Our buttercream guide has the base recipe those yields come from.
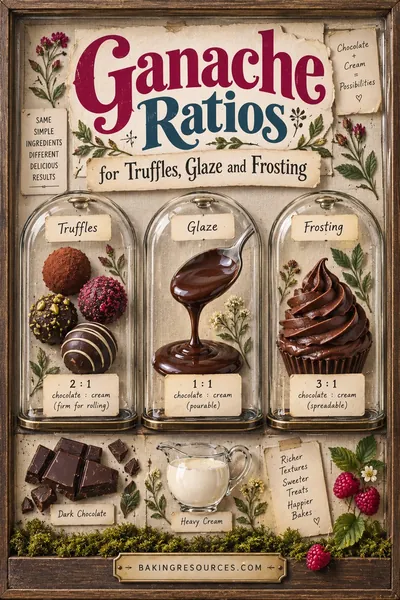
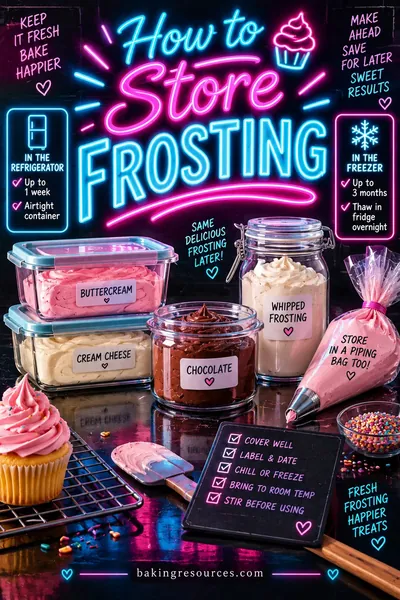
The grams column matters if you are weighing rather than scooping. Italian meringue buttercream is the lightest butter frosting at 189 g per cup, so the same cup number means a noticeably different amount on the scale depending on what you made. Ganache is the densest at 265 g per cup, and it changes again with the chocolate to cream ratio; the ganache ratio guide has the splits. Whipped cream stays lightest at 129 g per cup and will not hold tall piping, and the whipped cream method covers stabilizing it so it survives the day. Leftover frosting of any kind keeps a week in the fridge and three months frozen, and how to store frosting covers bringing it back without it splitting.
If you would rather skip the arithmetic, the frosting calculator runs this exact model for any pan size and finish, the cake servings calculator works out what size cake you need in the first place, the pan converter handles moving a recipe between pan shapes, and the ingredient weights chart keeps every gram conversion on this site consistent.
With the amount settled, here is the technique that gets it onto the cake cleanly.
How to frost a cake: the full sequence
Here's the order. Don't rearrange it, because each step depends on the one before.
- Cool the layers completely. Room temperature all the way through, or better, chilled. Warm cake melts frosting on contact.
- Level the tops. Flat layers stack straight. Domed layers make a wobbly cake.
- Put the bottom layer on a cake board, cut-side up, with a dab of frosting underneath to anchor it.
- Pipe a dam of stiffer frosting around the edge if you're using a soft filling.
- Fill and stack. Repeat for each layer, checking level as you go.
- Crumb coat. Thin. You should see cake through it.
- Chill 20 to 30 minutes until the surface is dry and firm.
- Final coat. Generous, top first, then sides.
- Smooth with a bench scraper against a turntable, in one continuous turn.
- Chill 15 minutes before decorating or transporting.
Total hands-on time for a two-layer cake is about 30 minutes, plus the chilling. Budget an hour and a half start to finish.
Step 1: level, torte and board
Leveling. Cakes dome because the edges of the pan set first and the center keeps rising. Cut the dome off and you get a flat, stackable layer with a slightly denser surface that actually holds frosting better.
Use a long serrated knife. Put the layer on a turntable, hold the knife level with the counter, and rotate the cake into the blade rather than sawing the knife forward. Cut a shallow scoring line all the way around first, then work inward. Two or three rotations gets you through.
A cheaper trick if your knife wanders: press the cake gently with your palm right after it comes out of the pan, while it's still warm. The dome compresses and you often don't need to cut at all.
Torting means splitting a layer horizontally into two thinner ones, which turns a two-layer cake into four and doubles your filling. Same technique: score around the perimeter at the height you want, then cut inward. Mark the front of the cake with a toothpick through both halves before you separate them so you can put them back in the same alignment.
The cake board is not optional in practice. It's a stiff cardboard round the exact diameter of your cake that lets you lift, turn and move the finished cake without touching it. Buy a pack, or cut one from a clean corrugated box and cover it in foil. Anchor the cake to it with a spoonful of frosting so it can't slide.
Building on a board also means you can decorate on a turntable and transfer to the serving plate at the end, which is far easier than trying to frost on the plate itself.
Step 2: filling and the dam
Filling squeezing out from between the layers is what causes a bulge ring around the middle of a finished cake, usually appearing an hour after you thought you were done.
The fix is a dam. Take some of your buttercream and stiffen it with a couple of extra tablespoons of powdered sugar until it holds a sharp peak. Pipe a ring of it just inside the edge of the layer, about 1/2 inch wide and 1/2 inch tall. Then fill the middle with whatever soft filling you're using: jam, curd, ganache, softer buttercream.
The dam does two jobs. It physically contains the filling, and it takes the compression load of the layer above so the soft filling isn't being squeezed sideways.
Rules of thumb for filling amounts:
- 6-inch layer: 1/2 cup filling
- 8-inch layer: 3/4 cup filling
- 9-inch layer: 1 cup filling
- 10-inch layer: 1 1/4 cups filling
Spread it level with an offset spatula, then set the next layer on gently and press straight down with flat palms. Don't twist. Check that the stack is vertical by eye from two sides before you move on.
If you're filling with anything containing cream cheese, custard or whipped cream, the finished cake has to live in the refrigerator for food safety.
Step 3: the crumb coat, explained
A crumb coat is a deliberately thin layer of frosting whose only job is to trap crumbs. It is not meant to look good and it is not meant to cover the cake.
Here's why it works. A cut or torn cake surface sheds crumbs constantly. When you drag a spatula loaded with frosting across that surface, friction pulls crumbs off the cake and mixes them into the frosting, and then you spread that crumb-flecked frosting around the rest of the cake. Every pass makes it worse.
The crumb coat accepts that. You spread a thin layer, it fills the pores and the gaps, it picks up every loose crumb, and then you chill it. Once that layer is firm, the crumbs are locked in a solid matrix and physically cannot move. The final coat then goes onto a smooth, sealed, non-shedding surface and stays clean.
Doing it:
- Use about a quarter of your total frosting.
- Spread it thin enough to see cake color through it in places. That's correct, not a mistake.
- Get into the gap between layers and press frosting in, so the sides are one continuous surface.
- Scrape the excess back into a separate bowl, not the main one. That bowl now has crumbs in it and you don't want them in your finish frosting.
- Chill 20 to 30 minutes in the refrigerator, or 10 in the freezer. It's ready when you can touch it lightly and nothing comes off on your finger.
Twenty minutes of waiting is the whole cost. It's the highest return step in cake decorating.
Step 4: the final coat and smoothing
Take the cake out of the fridge and get started while it's still cold. A cold cake is firm and doesn't tear.
Top first. Drop a large mound of frosting on top and push it out to the edges with an offset spatula, keeping the blade flat and moving it in one direction. Deliberately push a little over the edge all the way around, creating a small overhanging lip.
Then the sides. Load the spatula and press frosting onto the side, turning the turntable rather than moving your arm. Go all the way around, building the sides thicker than you think you need. The overhang from the top gets absorbed into the sides as you go.
Then smooth. Hold a bench scraper vertically against the side of the cake, blade perpendicular to the turntable, and hold it still while you spin the turntable in one continuous rotation. Don't move the scraper. The turntable does the work. One full rotation, then lift the scraper away cleanly and scrape the excess off into your spare bowl.
Repeat until the sides are even. Then bring the top edge in: hold the spatula flat and pull the raised lip of frosting from the edge toward the center, wiping the blade between each pull. That gives you a sharp top edge.
If the frosting is dragging or the surface looks torn, it's too cold or the cake is too cold. Wait five minutes. If it's sliding or won't hold an edge, it's too warm. Chill for ten.
A warm spatula dipped in hot water and wiped dry gives you a final glassy pass for a very smooth finish. Dry it completely or you'll streak water into the buttercream. If fondant is going over the top, that smooth base is what stops it tearing, and rolling fondant without cracking covers the sheet itself.
Temperature: the thing that actually decides your finish
Buttercream is an emulsion of butter and sugar, and butter has a narrow working range.
| Frosting temp | Behavior | What to do |
|---|---|---|
| Below 60°F (fresh from fridge) | Stiff, tears the cake, won't spread | Sit out 1 to 2 hours, then rewhip |
| 65 to 72°F | The working range: spreads, holds an edge, smooths | Use it |
| Above 75°F | Slides, sags, won't hold a piped shape | Chill 15 min, rewhip briefly |
| Above 80°F | Separates, looks curdled or soupy | Chill 30 min, rewhip until it comes back |
Rewhipping after refrigeration is mandatory, not optional. Chilled buttercream sets solid and its texture goes grainy. Let it come to room temperature on the counter, which takes one to two hours for a full batch, then beat it on medium speed for two to three minutes. It will look wrong for the first minute and then suddenly come back together, smooth and glossy. That's the emulsion re-forming.
If it still looks curdled after three minutes it's too cold in the middle. Warm a quarter cup of it in the microwave for 8 seconds, add it back, and keep beating.
If it's too soft, it's usually because the butter was too warm to start with. Our how to soften butter guide covers hitting the 65 to 67°F window, which is the same target that makes buttercream behave.
The cake itself should be cold; the frosting should be room temperature. That combination gives you the most working time before things go soft.
Tools, and what you can use instead
| Tool | What it does | Substitute |
|---|---|---|
| Offset spatula, 8 inch | Spreading without your knuckles hitting the cake | Dinner knife, or a flat rubber spatula |
| Bench scraper or icing smoother | The one continuous pass that makes sides straight | Sturdy piece of cardboard cut straight, or a metal ruler |
| Turntable | Lets you spin instead of walk around the cake | Lazy Susan, or an upside-down cake pan on a plate |
| Cake board | Moving the cake without touching it | Cardboard round cut and covered in foil |
| Serrated knife, 10 inch+ | Leveling and torting | Unflavored dental floss pulled through the layer |
| Piping bag | Dams and borders | Zip bag with a corner snipped off |
The turntable is the one worth buying. Every smooth-sided cake you've admired was made by holding a scraper still and rotating the cake, and that's very hard to fake by walking in circles.
Common problems and quick fixes
- Crumbs in the finish coat. The crumb coat wasn't chilled long enough, or you used the crumby bowl for the final coat. Chill and go over it again with clean frosting.
- A bulge around the middle. The filling squeezed out. Chill the cake hard, run a hot knife around the bulge to cut it back, then patch and re-smooth.
- Air pockets in the sides. You didn't press the frosting on firmly enough. Fill them with a spatula tip and do one more scraper pass.
- The cake sliding on the board. No frosting anchor underneath. Too late to fix mid-decoration, so chill it solid and be careful.
- Frosting pulling the top layer apart. The cake is too warm, too fresh or too tender. Chill the layers for 30 minutes before frosting. Cold cake is always easier.
- Streaky, grainy buttercream. The powdered sugar wasn't dissolved or the mix was too cold. Beat longer, add a tablespoon of warm milk.
- Frosting too thin to hold a border or a shape. It's too warm, or it was overthinned trying to fix a different problem. Chill it and rewhip rather than adding more powdered sugar; see why is my frosting runny for the full fix.
Frequently asked questions
What is a crumb coat and can I skip it?
A crumb coat is a thin first layer of frosting that traps loose crumbs and gets chilled until firm, so those crumbs can't move into your finish coat. You can technically skip it, but the result is a speckled, torn-looking surface that no amount of extra frosting fixes. Twenty minutes of chilling is the cheapest quality upgrade in cake decorating.
How long should a cake chill after the crumb coat?
Twenty to 30 minutes in the refrigerator, or about 10 in the freezer. The test is touch: press lightly and if nothing comes off on your finger, the layer has set and you can go on. Longer is fine, and a crumb-coated cake can sit overnight in the fridge wrapped.
Should the cake be cold or room temperature when I frost it?
The cake should be cold and the frosting should be at room temperature, around 65 to 72°F. Cold cake is firm, sheds fewer crumbs and doesn't tear under the spatula, while room-temperature frosting spreads without dragging. A warm cake plus warm frosting is the combination that produces a sliding mess.
How do I smooth buttercream without a bench scraper?
Cut a straight-edged piece of stiff cardboard or use a clean metal ruler, hold it vertically against the side, and rotate the cake while keeping it still. For the very last pass, dip an offset spatula in hot water, dry it completely, and glide it over the surface. The heat melts the outermost film of buttercream just enough to level it.
How much frosting do I need for a two-layer 8-inch cake?
About 3 3/4 to 4 cups, close to 963 g of American buttercream, covering the crumb coat, the filling, the final coat and a simple border. A standard batch, built from 1 cup of butter and 4 cups of powdered sugar, yields about 3 cups, so plan on one and a quarter batches. Add extra if you're piping decoration rather than spreading it, and see the chart earlier in this guide for other pan sizes.
Why does my buttercream look curdled after refrigerating?
The butter and liquid separated in the cold, and it needs both warmth and mechanical energy to re-emulsify. Let it sit out until it's genuinely room temperature, then beat on medium for two to three minutes. It will look worse before it suddenly comes back together and turns glossy.
Do I need a cake turntable?
Not strictly, but it's the difference between smooth sides and merely acceptable ones, because straight sides come from holding a scraper still and rotating the cake. A lazy Susan from the kitchen cabinet works, and so does an upside-down cake pan set on a dinner plate so it spins on the rim.
Can I frost a cake the day before serving?
Yes, and it's usually better. A buttercream-frosted cake holds two to three days at room temperature under a dome, and refrigerated cakes should come out two hours before serving so the butter softens back to a pleasant texture. Anything with cream cheese frosting, custard or whipped cream has to stay refrigerated until serving time.
Related guides: Frosting calculator | Cake servings calculator | How to soften butter | Why did my cake sink? | Pan converter