How to Melt Chocolate

Melt it low and slow, and keep water away from it. Chocolate has no water of its own, so a single drop of steam or a wet spoon makes the sugar in it clump and pull the whole bowl into a stiff, grainy paste in about two seconds.
That's the part that surprises people. More liquid is what fixes seized chocolate, but a tiny bit of liquid is what causes it. Everything else is just heat control: dark chocolate stops at about 120°F, milk and white at about 110°F, and past that you get scorched, chalky solids that no amount of stirring brings back.
Stir constantly, pull it off the heat while a few lumps are still visible, and let the residual warmth finish the job.
Not sure your oven or your thermometer agrees with the recipe? Our free oven temperature converter turns any Fahrenheit, Celsius or gas mark number into the others so you're working from the right target.
Updated August 2026
How to melt chocolate: the three methods compared
There are three methods worth knowing, and they trade speed against control in a predictable way.
| Method | Best for | Speed | Pros | Cons | Temperature ceiling |
|---|---|---|---|---|---|
| Double boiler | Coating, dipping, any batch over 8 oz | Slow (6 to 10 min) | Gentlest heat, very hard to scorch, easy to hold warm | Steam is right there, so the seizing risk is real | Water at a bare simmer, roughly 180°F, chocolate at 110 to 120°F |
| Microwave, short bursts | Speed, small batches, folding into batter | Fast (60 to 90 sec of actual power) | No water anywhere near it, one bowl to wash | Heats from the inside out, so it lies to you about how hot it is | Power at 50%, chocolate at 110 to 120°F |
| Warm oven | Large batches, hands-off melting | Slowest (15 to 25 min) | Truly even, no stirring for the first half, no steam | Ties up the oven, easy to forget | Oven at 150 to 170°F, chocolate at 110 to 120°F |
Pick the double boiler when the finish matters and the microwave when it doesn't. The warm oven method is the quiet favorite for anything over a pound.
Method 1: the double boiler
You don't need a dedicated double boiler. A heatproof bowl set over a saucepan does the same job.
- Chop the chocolate into pieces about the size of a pea. Uneven pieces melt unevenly, and the big ones tempt you to raise the heat.
- Put an inch of water in the saucepan and bring it to a bare simmer, then turn it down further. You want wisps of steam, not bubbles.
- Set the bowl on top. The bowl must not touch the water, and it should sit wide enough on the rim that steam can't curl up over the edge into the chocolate.
- Stir slowly and constantly with a dry silicone spatula.
- When about three quarters of it has melted and you can still see soft lumps, take the bowl off the pan and keep stirring. The bowl holds enough heat to finish it.
Step 5 is what separates smooth chocolate from grainy chocolate. The residual heat in a warm bowl is plenty, and it can't overshoot.
Dry the bottom of the bowl before you pour, because condensation collects there and one drip into the chocolate undoes the whole thing.
Method 2: the microwave, in short bursts
The microwave is faster and, oddly, safer on the water front, since there's no steam involved at all. The catch is that microwave energy heats the fat in the center of the pile before the surface shows any sign of it. Chocolate can be well past 130°F in the middle and still look like solid chips on top.
The fix is short bursts and stirring between every one.
- Use a dry, microwave-safe bowl. Glass or ceramic, never plastic that's been through a greasy dishwasher cycle.
- Set the power to 50%. Full power is the single most common reason home cooks scorch chocolate.
- Go 30 seconds, stir for 15 seconds, then 15-second bursts after that.
- Stop when it's about 70% melted and stir it smooth off the heat.
The stirring isn't optional busywork. It's how you move heat out of the hot center and into the cold edges, and it's the only temperature control the method gives you.
Worked example: 8 oz of dark chocolate in the microwave
Say you have an 8 oz (227 g) bar of 60% dark chocolate, chopped.
- 0:00 to 0:30 at 50% power. It looks completely unchanged. Stir for 15 seconds anyway.
- 0:30 to 0:45. The edges start going glossy. Stir. Now it's maybe 30% melted.
- 0:45 to 1:00. Most of it is fluid with visible lumps. Stir for 30 seconds and check.
- 1:00 to 1:15 only if you still have real lumps. You probably don't.
Total power time: about 75 seconds. If you had run that same bowl at full power for 75 straight seconds, the center would have hit 140°F or more and the chocolate would be thick, dull and slightly gritty. Same total energy, completely different result, purely because of how it was delivered.
Halve the burst times for 4 oz. For 16 oz, start with 45 seconds instead of 30 but keep the follow-up bursts at 15.
Method 3: the warm oven
This one gets overlooked and it's genuinely good for large batches.
Set the oven to its lowest setting, ideally 150 to 170°F. Put the chopped chocolate in a wide, shallow metal or ceramic pan and slide it in. Check at 10 minutes, stir, then check every 5 minutes after that.
Most home ovens can't go below 170°F, and many run hot by 25°F or more, which is exactly the kind of gap that turns a gentle melt into a scorch. Check yours against a separate oven thermometer, and if 170°F is your floor, prop the door open with a wooden spoon.
Use our oven temperature converter if your recipe is written in Celsius or gas marks, so you're not eyeballing the dial. For reference, 350°F is 177°C and gas mark 4, which is more than twice the heat you want here.
Chocolate melting temperatures by type
Cocoa butter starts to soften around 86°F and is fully liquid by roughly 95°F. That's the melting part. The ceiling is a separate number, and it's about what else is in the bar.
| Chocolate type | Fully melted at | Working ceiling | Scorches above | Why |
|---|---|---|---|---|
| Unsweetened / bittersweet dark | 110 to 115°F | 120°F | 125 to 130°F | Mostly cocoa solids and cocoa butter, little else to burn |
| Semisweet dark | 110 to 115°F | 120°F | 125 to 130°F | Same, with more sugar |
| Milk chocolate | 105 to 110°F | 110°F | 115 to 120°F | Milk solids brown and then burn at low heat |
| White chocolate | 105 to 110°F | 110°F | 115°F | Highest milk solids and sugar, no cocoa solids to buffer it |
| Compound / melting wafers | 110 to 115°F | 120°F | 130°F+ | Vegetable fat instead of cocoa butter, much more forgiving |
Ten degrees separates milk and white from dark, and that's a smaller margin than most stovetops give you. Treat white chocolate as the fragile one and everything else feels easy. Candy melts sidestep the whole problem, and candy melts compared with white chocolate covers the trade you make.
Why milk and white chocolate scorch at lower temperatures
Dark chocolate is basically cocoa solids, cocoa butter and sugar. Milk and white chocolate add milk solids, which are milk proteins and milk sugars, and those behave like any other dairy on heat: they brown, then they burn, and they do it well below the temperature that bothers cocoa butter.
White chocolate is the extreme case because it has no cocoa solids at all. It's cocoa butter, sugar and milk solids, so the two most heat-sensitive ingredients make up almost the entire bar. White chocolate that's gone thick and yellowish has scorched, not seized, and stirring won't fix it.
Practical rule: melt milk and white chocolate to about 70% and let carryover heat do the last 30%, always. With dark you can get away with 80%.
What seizing actually is
Chocolate is a suspension of dry particles, sugar crystals and cocoa solids, floating in fat. There's no water in it. That's why it flows.
Add a small amount of water and the sugar on the surface of those particles dissolves into it. The dissolved sugar turns sticky, the wet particles glue themselves to each other, and the whole suspension locks into a stiff, dull mass in a couple of seconds. The fat gets squeezed out and the texture goes from silk to wet sand.
Common ways a drop gets in: - Steam curling over the rim of a bowl that's too small for the pan - Condensation on the bottom of the bowl, dripping when you lift it - A spatula that was rinsed and not dried - Water on the chopping board or knife - Adding cold milk or cream straight to melted chocolate
That last one catches good bakers. A splash seizes it. Enough liquid doesn't, which is the counterintuitive part.
How to fix seized chocolate
Here's the move that feels wrong and works: add more liquid.
The reason a drop seizes chocolate is that there isn't enough water to dissolve all the sugar, so you get a paste. Add enough water and the sugar fully dissolves, the particles get suspended again, and the mixture goes smooth. You've made a thin ganache instead of melted chocolate, but it's usable.
The rescue: stir in 1 teaspoon of boiling water per ounce (28 g) of chocolate, one teaspoon at a time, off the heat. Hot liquid works better than cold. It'll look worse before it looks better, then it comes together glossy and pourable.
Cream, milk or a matching liqueur work too and taste better than water.
The honest limit: rescued chocolate is no longer suitable for coating, dipping, drizzling or anything that has to set hard and snap. You've permanently changed it into a soft, water-containing mixture. It will stay soft at room temperature.
What it's still good for: - Stirring into brownie, cake or cookie batter - A hot chocolate base - A quick glaze or sauce - Folding into buttercream, which is a fine use for it (see how to frost a cake for the folding technique)
If you needed coating chocolate, start over with a fresh, dry bowl. That's not a failure of technique, it's just what the chemistry allows.
Chocolate chips vs bars for melting
Chocolate chips are engineered to hold their shape in a 375°F oven. That's the entire point of them, and it's achieved by cutting the cocoa butter with less fat overall and adding stabilizers plus emulsifiers that raise the effective melting behavior.
Melt them and they go thick and pasty rather than fluid. They'll never thin out to a coating consistency no matter how long you stir.
| Use | Chips | Bar / baking chocolate | Melting wafers |
|---|---|---|---|
| Coating or dipping | No | Yes | Yes |
| Drizzle that sets | No | Yes | Yes |
| Stirring into batter | Fine | Yes | Fine |
| Ganache | Poor texture | Yes | Acceptable |
| Cost per ounce | Low | Medium | Medium |
If chips are all you have and you need something pourable, add a teaspoon of neutral oil or shortening per 6 oz of chips. It thins them enough to drizzle, though the set will be soft. Need a different swap entirely? Our substitutions guide covers the common baking-chocolate and cocoa exchanges, including the cocoa-plus-fat trick when you have no bar at all.
A short, honest note on tempering
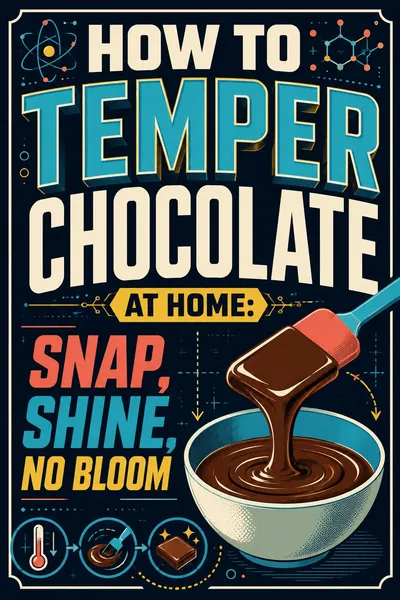
Tempering is not the same thing as melting, and most recipes that say "melt chocolate" don't need it.
Cocoa butter can crystallize into six different forms, and only one of them (form V) gives you a hard snap, a glossy surface, and chocolate that doesn't melt on your fingers. Tempering is the process of heating and cooling chocolate through a specific sequence so that only form V crystals survive to seed the rest.
The short version of the seeding method, for reference:
| Type | Melt to | Cool to | Rewarm and hold at |
|---|---|---|---|
| Dark | 115°F | 82°F | 88 to 90°F |
| Milk | 110°F | 80°F | 86 to 88°F |
| White | 110°F | 78°F | 84 to 86°F |
You need an instant-read or infrared thermometer, patience, and a cool room. This site isn't going to pretend that's a footnote to a melting article, because it isn't. It's a separate skill with its own failure modes.
When do you need it? Bonbons, molded chocolate, dipped strawberries that have to look professional, and anything that will sit out at room temperature. When don't you? Anything going into a batter, a ganache, a frosting, a sauce, or a drizzle you'll refrigerate. That covers most home baking.
Untempered chocolate that sets soft and streaky is still perfectly good to eat. Those pale streaks are fat bloom, not mold, and they're a cosmetic problem only.
Frequently asked questions
Why did my chocolate seize when I added cream?
You added too little, or it was cold. A small amount of liquid dissolves some of the sugar and glues the particles together. Add hot cream in a quantity that matches the chocolate, or add it a teaspoon at a time until it goes smooth again.
Can you melt chocolate chips for dipping?
Not well. Chips carry stabilizers that keep them holding their shape in the oven, so they melt thick and pasty instead of fluid. Use a chopped bar or melting wafers for dipping, and save the chips for batters and cookies.
What temperature does chocolate melt at?
Cocoa butter softens around 86°F and is fully fluid by about 95°F, so chocolate is completely melted at 110 to 115°F. The ceiling is what matters: 120°F for dark, 110°F for milk and white, and above that you scorch it.
How do I melt white chocolate without burning it?
Chop it fine, use 50% microwave power in 15-second bursts, and stop at about 70% melted. White chocolate has the most milk solids and sugar and no cocoa solids to buffer them, so it can scorch by 115°F.
Can I microwave chocolate on full power?
You can, but it's the most common way people ruin it. Microwaves heat the center first, so the middle can be past 130°F while the top still looks solid. Use 50% power and stir between short bursts.
Is seized chocolate ruined?
Not for baking. Stir in 1 teaspoon of boiling water per ounce of chocolate to bring it back to a smooth, pourable state, then use it in a batter, glaze or sauce. It won't set hard again, so it can't be used for coating.
Why is my melted chocolate thick and grainy?
Two possibilities. Grainy plus stiff and dull means it seized from moisture. Grainy plus thick with a slightly burnt smell means it scorched, and there's no rescue for that one.
Do I need to temper chocolate for baking?
No. Tempering only matters for chocolate that has to set hard, look glossy and snap at room temperature. Anything folded into batter, whisked into ganache or refrigerated after doesn't need it.
Related guides: Oven temperature converter | Baking substitutions | How to frost a cake | Ingredient weights chart | Butter converter