How to Cut Butter Into Flour

You're not mixing the butter in. You're breaking it into flour-coated pieces and stopping while those pieces are still there. Cold butter chunks melt in the oven, the water in them turns to steam, and the gaps they leave behind are the flaky layers.
So the skill is knowing when to stop, not how hard to work. The mixture should look coarse and uneven, with visible butter pieces from the size of oat flakes up to small peas. If it looks like smooth damp sand, you've gone too far and the pastry will be short and crumbly instead of flaky.
Working from sticks or cups? Our free butter converter handles sticks, cups, grams and tablespoons in one step.
Updated September 2026
Why the butter pieces have to survive
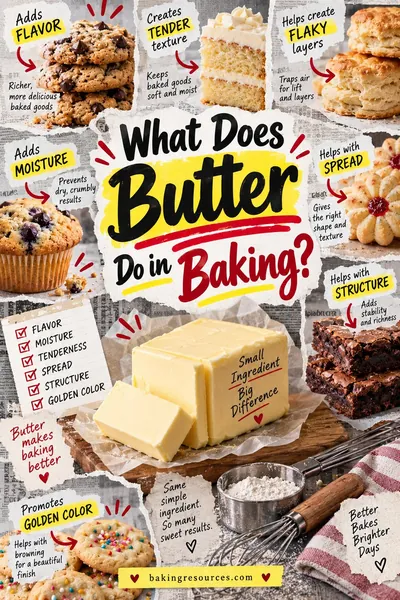
Butter is roughly 80% fat, 16% water and 4% milk solids. Both parts of that do a job.
The fat coats flour particles and physically blocks them from linking into gluten. That's what makes pastry tender. It happens whether the butter is in big pieces or fully blended, which is why a fully blended dough is still tender, just not flaky.
The water is where flakiness comes from. When a pea-sized piece of butter hits a 400F oven, the fat melts and the water inside it flashes to steam. That steam pushes the dough apart and leaves a void. Hundreds of those voids stacked up is what "flaky" means.
Blend the butter fully into the flour and you have no discrete pieces, so no steam pockets, so no layers. You get a shortbread texture. Perfect for shortbread. Wrong for pie.
This is the opposite of what you're doing when you cream butter and sugar, where the goal is a completely uniform, aerated mixture and the butter needs to be soft. Same two ingredients, opposite technique, opposite temperature.
What the finished mixture should look like
Recipes describe the target by size, and those sizes are not interchangeable. Bigger pieces mean flakier and more fragile. Smaller pieces mean sturdier and more tender.
| Piece size | Looks like | Use it for | Result |
|---|---|---|---|
| Coarse crumbs, oat flakes | Damp sand with lumps | Scones, shortcake, crumb toppings | Tender, close-textured, easy to handle |
| Pea sized | Small irregular pebbles through the flour | Standard pie crust, galettes | The default, good flake and good structure |
| Walnut halves, flattened | Big flat shards of butter, lots of dry flour left | Rough puff, very flaky pie crust, biscuits with pull-apart layers | Maximum flake, harder to roll, more likely to leak |
Most pie dough recipes are asking for a mix of the first two, and that's what you actually want: some fine crumbs to bind the dough, some pea-sized pieces to make layers. A dough that's all one size is either too fragile or too dense.
For biscuits, lean bigger. Those flat shards are what makes a biscuit pull apart in sheets.
A practical tell: grab a handful and squeeze. If it holds together in a rough clump when squeezed but falls apart when you poke it, you're there. If it won't clump at all, keep going a little. If it's already a paste, you went too far.
How to cut butter into flour: five methods compared
| Method | Control | Speed | Risk of overworking | Keeps butter cold | Best for |
|---|---|---|---|---|---|
| Pastry blender | Excellent | Medium | Low | Yes | Pie crust, the default choice |
| Two knives | Good | Slow | Very low | Yes | No special tools on hand |
| Fingertips | Good | Fast | Medium | No, hands warm it | Scones, small batches, experienced hands |
| Box grater, frozen butter | Excellent | Fast | Very low | Yes, if you work quickly | Beginners, biscuits, pie crust |
| Food processor | Poor | Very fast | Very high | Yes, briefly | Large batches when you're watching closely |
Pastry blender
A handle with five or six curved metal blades. Press it straight down into the butter and flour, twist slightly, lift, repeat. Scrape the blades clear with a knife when butter packs into them, which it will.
Work around the bowl rather than in one spot, and stop to look every 20 seconds or so. The whole job takes about two minutes for a single crust.
Buy a metal one with rigid blades. The flimsy wire versions bend around cold butter instead of cutting it.
Two knives
Hold a table knife in each hand, blades crossing in the bowl, and draw them past each other through the butter in a scissoring motion. Slow but very controllable, and it's essentially what a pastry blender does with more repetitions.
Bench scrapers work the same way and cut faster. Two forks also work, though the tines pack with butter almost immediately.
Fingertips
Pick up butter and flour together, press the butter flat between your thumb and fingertips, and let it fall back into the bowl. Repeat, lifting from the bottom each time so everything gets coated.
Fast and precise, because you can feel exactly what size the pieces are. The problem is heat. Your hands are about 90F and butter starts softening around 60F.
Rules for making it work:
- Fingertips only. Never your palms. Palms are warmer and have more surface area.
- Lift and drop. Bringing the mixture up out of the bowl and letting it fall cools it as it goes.
- Run your hands under cold water first and dry them completely.
- Work in short bursts. 30 seconds of work, then put the bowl back in the fridge for five minutes if the butter is getting greasy.
- If your hands run hot, use another method. Some people genuinely cannot do this one in a warm kitchen, and there's no technique fix for it.
Box grater with frozen butter
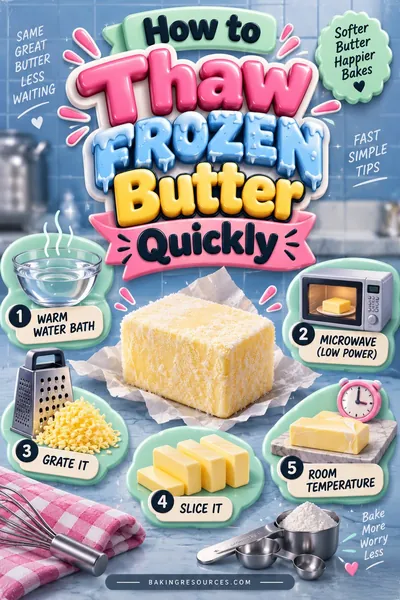
Freeze the butter for at least 30 minutes, or use it straight from the freezer. Grate it on the large holes directly into the bowl of flour, stopping every few passes to toss the shreds with flour so they don't clump.
This is the method to use if you're new to pastry. It's close to impossible to overwork, the pieces come out uniform, and the butter stays cold because you're barely touching it. The shreds are roughly pea-sized already, so most of the job is done before you start mixing.
Two tips. Hold the butter with a piece of its own wrapper so your hand isn't warming it. And if the stick starts softening, put it back in the freezer for ten minutes rather than pushing through.
Food processor
Pulse the flour and salt to combine, add cold cubed butter, then pulse in one-second bursts. Six to ten pulses is usually enough. Dump it into a bowl to add the liquid, because the processor blade will overwork the dough the instant water goes in.
Fast and consistent, and the easiest way to ruin the dough. The blade spins far faster than you can judge, and the difference between pea-sized pieces and a smooth paste is about two seconds. Pulse, look, pulse again. Never run it continuously.
If you're making one pie crust, a pastry blender is not meaningfully slower and it's far harder to get wrong. The processor earns its place at three or four crusts.
Temperature is most of the technique
Cold butter cuts into pieces. Warm butter smears into the flour. Once it has smeared you cannot un-smear it, and no amount of chilling afterward brings the pieces back.
What to do:
- Cube the butter and freeze it for 15 minutes before you start. Not the whole stick, cubes, so the cold reaches the middle.
- Chill the bowl. Metal bowls in the freezer for ten minutes make a real difference on a warm day.
- Use ice water for the liquid, with the ice still in the measuring cup, and pour the water off the ice.
- Stop and chill mid-way if the butter looks shiny or greasy. Fifteen minutes in the fridge costs you nothing.
- Don't work in a hot kitchen if you can avoid it. Making pastry right after the oven has been on for an hour is fighting yourself.
A useful check: at the end, the butter pieces should still feel firm when you pinch one. If they squash into a smear, the dough needs to go back in the fridge before you add water.
Overworked butter is one of the two main causes of a tough crust, the other being too much water and mixing. Both are covered in why is my pie crust tough.
Laminating versus cutting in
These are two different ways to build layers and they belong in different recipes.
Cutting in distributes butter pieces randomly through the flour. The layers that result are short, irregular and go in all directions. That's what you want in a pie crust, where the flakes should be tender and break easily under a fork.
Laminating keeps the butter in continuous sheets. You roll the dough out, fold it in thirds, turn it, and roll again, chilling between turns. Each fold triples the layer count, so six turns gets you into the hundreds. That's croissants, puff pastry and Danish, where the layers are meant to be tall, even and visible.
There's a middle ground worth knowing about. If you cut butter into flour in large flat shards, then give the finished pie dough two or three letter folds before chilling, you get a rough puff. More flake than a standard crust, far less work than real lamination. It's the best return on effort in pastry.
Blind baking is where flaky crusts prove themselves or slump, so if the crust is going in empty, read how to blind bake a pie crust before you build it.
Butter, shortening and lard compared
| Fat | Melting point | Flakiness | Flavor | Handling |
|---|---|---|---|---|
| Butter | 90 to 95F | Very good, from steam | Best by a wide margin | Softens fast, needs cold hands and a cold room |
| Shortening | 115 to 120F | Good, from fat only | None, slightly waxy mouthfeel | Very forgiving, stays firm at room temperature |
| Lard | 100 to 110F | Excellent | Mild and savory, good in pies | Forgiving, softer than shortening |
| Half butter, half shortening | Mixed | Very good | Good | The usual compromise |
Butter is the only one of these with water in it, which is why it's the only one that makes steam. Shortening and lard produce flakes purely by keeping dough layers apart, which works but gives a different, slightly denser flake.
Shortening's real advantage is temperature. It doesn't soften until well above room temperature, so it stays in pieces while you work no matter how warm your kitchen is. That's why so many family pie recipes call for it.
The half-and-half approach gets you most of butter's flavor with most of shortening's forgiveness, and it's a reasonable default if your kitchen runs warm.
Worked example: a single 9-inch pie crust
Standard ratio for a single crust, by weight:
- Flour: 1 1/4 cups all-purpose = 156 g at 125 g per cup, spoon and level
- Butter: 1/2 cup, which is 1 stick = 113 g
- Ice water: 3 to 4 tablespoons = 45 to 60 g
- Salt: 1/2 teaspoon
That puts the butter at 72% of the flour weight, which is a rich, flaky crust. Drop to 100 g of butter for something sturdier that holds a fluted edge better. Go up to 125 g and you're at nearly 1:1, which is exceptionally flaky and genuinely difficult to roll without it tearing.
Now the timing. Cube the 113 g of butter into roughly 1/2 inch pieces, which is about 16 cubes from one stick, and freeze them for 15 minutes. Cut them into the flour with a pastry blender for 90 seconds to 2 minutes, checking at the one minute mark. You should still see distinct butter pieces, most of them pea-sized, some larger and flat.
Add the ice water 1 tablespoon at a time, tossing with a fork, and stop the moment the dough holds together when squeezed. Then chill for at least an hour before rolling.
If your recipe gives butter in sticks and you'd rather work in grams, or the other way around, the butter converter does sticks, tablespoons, cups and grams. One stick is 113 g, one cup is 227 g, one tablespoon is 14 g.
Frequently asked questions
What does "cut in butter until pea sized" actually mean?
It means the butter should be broken into irregular pieces roughly the size of small peas, with some smaller crumbs mixed in and some dry flour still visible. Squeeze a handful: it should clump when pressed and fall apart when poked.
How do I cut in butter without a pastry cutter?
Two table knives held crossed and drawn past each other work well, though slowly. A box grater with frozen butter is faster and more forgiving. Your fingertips are the quickest option if your hands aren't warm and you work in short bursts.
Can I use a food processor to cut butter into flour?
Yes, but pulse it in one-second bursts and check after every few. Six to ten pulses is usually enough. Running it continuously turns the butter to paste in seconds, and you should always transfer the mixture to a bowl before adding water.
Should the butter be frozen or just cold?
Refrigerator cold is enough for most methods, and freezing for 15 minutes after cubing gives you a useful safety margin. Butter must be fully frozen only for the box grater method, since a soft stick just smears against the grater.
Why is my pastry tough instead of flaky?
Usually too much water, too much mixing after the water goes in, or butter that smeared instead of staying in pieces. Gluten develops when flour meets water and gets worked, so add the minimum water and stop mixing while the dough still looks shaggy.
How much butter goes with 1 cup of flour?
For a flaky pie crust, about 90 g of butter per 125 g cup of flour, which is roughly 3/4 of a stick. Scones and biscuits use less, closer to 55 to 70 g per cup. More butter means flakier and harder to handle.
Can I cut butter into flour ahead of time?
Yes. The flour and butter mixture keeps in the fridge for 3 days and in the freezer for 3 months before you add liquid. Freezing it in a bag is a genuinely good shortcut for biscuits, since you go from freezer to oven in about ten minutes.
Does the flour need to be cold too?
It helps but it isn't essential, since flour has almost no thermal mass compared to butter. Chilling the bowl matters more. On a hot day, putting the flour and the bowl in the freezer for ten minutes is a cheap way to buy yourself working time.