
Easy Peppermint Bark Recipe

This peppermint bark recipe is just three things: a layer of dark chocolate, a layer of creamy white chocolate, and a crunchy shower of crushed candy canes on top. No oven, no candy thermometer. The one trick that matters is adding the white layer while the dark layer is set but not fully cold, so the two stay stuck together when you break it.
It takes about 2 hours start to finish, and only about 35 minutes of that is hands-on. The rest is chilling time in the fridge.
A 9 x 13 pan makes about 1 3/4 pounds of bark, or roughly 24 pieces. Pick your pan below (8 x 8, jelly roll and half sheet pans are in there too) and every amount updates so the bark stays the same thickness.
Recipe card
Peppermint Bark recipe
Pick your pan and how many you need. Every amount, the bake time and your start time update for you.
More free baking tools



Why this peppermint bark doesn't fall apart
The most common peppermint bark complaint is layers that split. You snap off a piece and the white top slides right off the dark bottom. Here's how this recipe avoids that:
- The timing of the second layer. The dark chocolate chills just 15 to 20 minutes, until it looks matte and feels set when you touch it lightly. At that point it's still a little soft underneath, so the warm white chocolate melts into it slightly and grabs on. If the dark layer chills for an hour, it's too cold and slick for the top to stick.
- Thin, even layers. About 1/8 inch of each chocolate in a 9 x 13 pan. Thin layers set evenly and break into neat shards instead of thick, crumbly slabs.
- Gentle melting. Chocolate that gets too hot turns thick and grainy, and white chocolate is the touchiest of all. Short bursts in the microwave and lots of stirring keep both layers smooth.
What chocolate is best for peppermint bark?
Use chocolate you'd happily eat on its own, because that's basically what you're making. Bars or baking wafers melt the smoothest. Chips work, but they have stabilizers that help them keep their shape in cookies, so they melt a bit thicker and set a little softer.
| Layer | Good choices | Notes |
|---|---|---|
| Bottom | Semisweet or bittersweet (about 55% to 70% cacao) | The slightly bitter edge balances the sweet white layer. |
| Bottom, kid-friendly | Milk chocolate | Sweeter and softer. Keep it in the fridge. |
| Top | White chocolate bars or wafers with cocoa butter in the ingredients | Melts smooth and tastes creamy. |
| Top, easiest | White candy melts | Very forgiving and sets firm at room temperature, but tastes sweeter and less creamy. |
If you've never used candy melts, our side-by-side look at white chocolate vs candy melts explains when each one makes sense. For a first batch, candy melts on top are a perfectly good shortcut.
 Baking guideWhite Chocolate vs Candy Melts: Which One to UseRead it next →
How to melt chocolate for bark without ruining it
Two rules: keep it dry and keep it gentle.
- Dry bowl, dry spatula. Even a few drops of water can make chocolate seize, which means it suddenly turns thick, dull and pasty. The small splash of peppermint extract is fine because it gets stirred into a lot of chocolate at once.
- Dark chocolate: Microwave in 30 second bursts and stir well every time. Stop when a few small lumps are left, then keep stirring. The heat of the melted chocolate finishes the job.
- White chocolate: Use 50% power in 20 second bursts. It scorches easily, and scorched white chocolate goes lumpy and can't be saved.
Prefer the stovetop? A heatproof bowl over a pan of barely simmering water works too. Here's more on how to melt chocolate with each method, plus what to do if it seizes.
 Baking guideHow to Melt Chocolate Without Seizing It: 3 Easy MethodsSee how it's done →
How to crush candy canes (without making powder)
Put unwrapped candy canes in a zip-top bag, press out the air, and tap them with a rolling pin or the bottom of a heavy pan. You want pieces about the size of a pea or smaller, with a few bigger chunks for crunch. Then pour them into a fine strainer and shake out the dust. That pink powder melts into the white chocolate and makes the top look streaky and sticky.
Six regular candy canes make about 1/2 cup crushed. Round peppermint candies work exactly the same way. Crush them just before you need them, because crushed candy pulls moisture from the air and gets tacky.
Step-by-step tips for picture-perfect bark
Spread with an offset spatula
An offset spatula (the bent kind) makes even layers easy. Tap the pan on the counter a few times after spreading to smooth the top and pop any air bubbles.
Watch the dark layer, not the clock
Start checking after 15 minutes. Touch a corner lightly. If it doesn't leave a mark on your finger and the surface looks matte, it's ready. If it still looks shiny, give it 5 more minutes.
Add the candy right away
White chocolate starts to set quickly on a cool layer underneath. Sprinkle the candy within a minute of spreading, then press it gently with your palm or the back of a spatula so it sinks in a little and doesn't fall off later.
Break it, or cut it
Let the chilled bark sit out about 5 minutes first so it doesn't shatter into crumbs. For rustic shards, snap it by hand. For neat squares to box up, warm a big knife under hot water, dry it well and press straight down.
Common peppermint bark mistakes
| Problem | Why it happened | What to do next time |
|---|---|---|
| The layers separate | The dark layer got too cold before the white went on | Chill only 15 to 20 minutes, until set but not hard. |
| White chocolate is thick and lumpy | It got too hot, or touched water | Use 50% power and short bursts, with a dry bowl and spatula. |
| Candy on top is sticky or weepy | Humidity, or candy dust in the mix | Shake out the dust, and store the bark airtight in a cool spot. |
| Bark is soft at room temperature | Untempered chocolate, chips or milk chocolate | Keep it chilled until serving, or use candy melts on top. |
| Gray streaks after a few days | Bloom from temperature swings | It's safe to eat. Store it at an even, cool temperature. |
How to store peppermint bark
Because this is an easy, untempered bark, it's happiest somewhere cool.
- Cool room (under about 68°F): Up to 1 week in an airtight container, with parchment between layers.
- Fridge: Up to 3 weeks, airtight. Let it sit out 5 to 10 minutes before serving.
- Freezer: Up to 2 months. Thaw it in the closed container so water doesn't bead up on the candy.
Keep it away from strong smells in the fridge (chocolate soaks them up like a sponge). More on that in how to store chocolate.
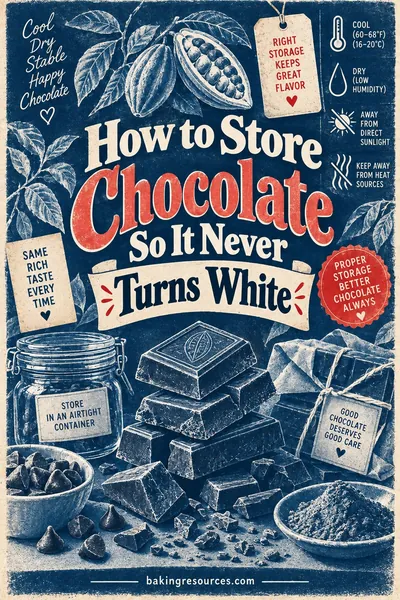 Baking guideHow to Store Chocolate So It Never Turns WhiteSee how long it keeps →
Peppermint bark makes a great gift
Honestly, this is one of the easiest homemade gifts there is. It looks fancy, packs flat, and you can make a big batch in an afternoon. A half sheet pan gives you enough for a whole round of neighbor tins. Pack it in tins or cellophane bags lined with parchment, and keep the bags cool until you hand them out.
Wondering how much to make? Our guide to how much bark fits in a gift tin turns pan sizes into pounds. And if you're putting together a candy plate, a batch of easy chocolate fudge sits right next to bark beautifully.
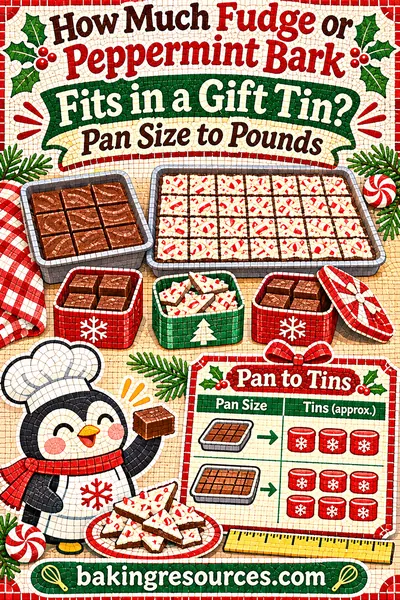 Baking guideHow Much Fudge or Peppermint Bark Fits in a Gift Tin? Pan Size to PoundsFind my pan size →
Easy ways to change it up
- Swirled bark: Drop spoonfuls of white chocolate over the set dark layer and drag a toothpick through for a marbled look.
- Triple layer: Add a thin middle layer of white chocolate tinted pale pink with a drop of oil-based candy coloring.
- Crunchy add-ins: Mix a handful of crushed chocolate sandwich cookies in with the candy canes.
- Milder mint: Skip the extract in the dark layer and let the candy canes carry the peppermint flavor.
Questions people ask
Why does my peppermint bark separate into layers?
The dark layer was too cold when the white chocolate went on. Chill the first layer only 15 to 20 minutes, until it looks matte and feels set but isn't hard. The warm white chocolate then melts into it a little and the two layers stick together when you break the bark.
Do you need to temper chocolate for peppermint bark?
No. This easy version skips tempering. The bark is firm straight from the fridge and holds well in a cool room, but it can soften on a warm counter. If you want bark that snaps and stays glossy at room temperature for weeks, you can temper the chocolate, but it isn't required.
Can I use chocolate chips for peppermint bark?
Yes. Chips work, but they melt a bit thicker and set a little softer than bars or baking wafers because they contain stabilizers. For the white layer, look for white chocolate with cocoa butter in the ingredients, or use white candy melts, which are the most forgiving.
How long does homemade peppermint bark last?
About 1 week airtight in a cool room, up to 3 weeks in the fridge, and about 2 months in the freezer. Keep parchment between layers, and thaw frozen bark in its closed container so moisture doesn't make the candy sticky.
How many candy canes do I need for peppermint bark?
About 6 regular-size candy canes make 1/2 cup crushed, which is enough for a 9 x 13 pan. Round peppermint candies work just as well, about 20 to 25 of them. Shake the crushed candy in a strainer to remove the fine dust before sprinkling.
Should peppermint bark be stored in the fridge?
It doesn't have to be if your kitchen is cool, but the fridge is the safest choice for untempered bark, especially in a warm house. Store it airtight so it doesn't pick up fridge smells, and let it sit out 5 to 10 minutes before serving.