How to Transport a Cake in the Car Without Ruining It

The secret to how to transport a cake is simple: chill the finished cake until the frosting is firm, set it on a sturdy board inside a box that fits snugly, and place the box flat on a non-slip mat on the car floor or in a level trunk, then drive gently with the car cool. A cold, well-supported cake that cannot slide is a cake that arrives looking the way it did on your counter.
Most cake disasters on the road come from three things: soft frosting, a cake that can slide, and heat. Fix those three and you can carry a layer cake to a birthday party, a sheet cake to a potluck, or even a small tiered cake to a family celebration without stress. This guide walks through a complete travel-day plan, from the night before to the moment you set the cake on the table.
Travel-Day Checklist
Here is the whole plan in one place. Each step is explained in detail below.
| When | What to do | Why it matters |
|---|---|---|
| Day before or morning of | Finish decorating and chill the cake | Firm frosting resists smudges and sliding layers |
| 1 to 2 hours before leaving | Make sure the cake is fully chilled | A cold cake is a stable cake |
| Before loading | Box the cake on a board that is slightly larger than the cake | Protects the sides and makes lifting safe |
| Before loading | Lay a non-slip mat on a flat surface in the car | Stops the box from sliding on turns and stops |
| 10 minutes before leaving | Run the air conditioning to cool the car | Heat is the fastest way to soften frosting |
| Loading | Carry the cake with two hands from underneath | Avoids squeezing the box or tipping the board |
| Driving | Gentle starts, slow turns, early braking | Sudden movement shifts layers and decorations |
| Arrival | Unbox in a cool spot and do touch-ups | Small smudges are easy to fix on site |
Step 1: Chill the Cake Before You Go
A cold cake is the single most important part of how to transport a cake. When buttercream is chilled, it firms up and grips the cake, the layers stop sliding on their fillings, and small bumps in the road no longer leave marks.
- Layer cakes with buttercream: Refrigerate for at least 1 to 2 hours, or overnight if your recipe and schedule allow. The frosting should feel firm to a light touch.
- Sheet cakes: Chill for at least an hour so the top frosting sets.
- Tiered cakes: Chill each tier fully. Many bakers transport tiers separately and stack them on site, which is far safer than moving a stacked cake.
- Whipped cream frostings: These soften quickly. Keep them as cold as possible until the moment you leave, and plan the shortest route.
- Cream cheese frosting: Must stay refrigerated for food safety and stability. Chill it well and keep the trip short.
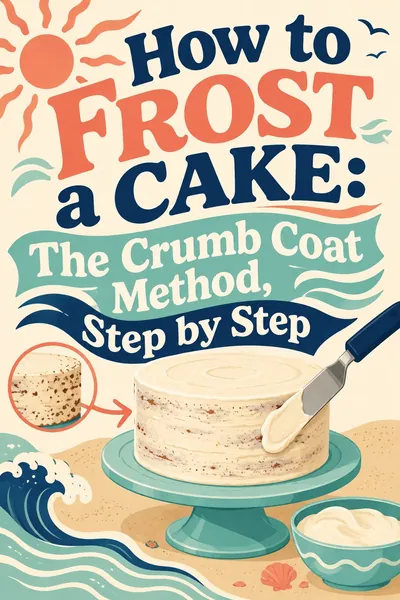
If you are still finishing the cake, our guide on how to frost a cake covers the crumb coat and final coat, both of which help the cake travel better. A cake with a thin, chilled crumb coat under the final layer holds together much more firmly than one with a single thick coat.
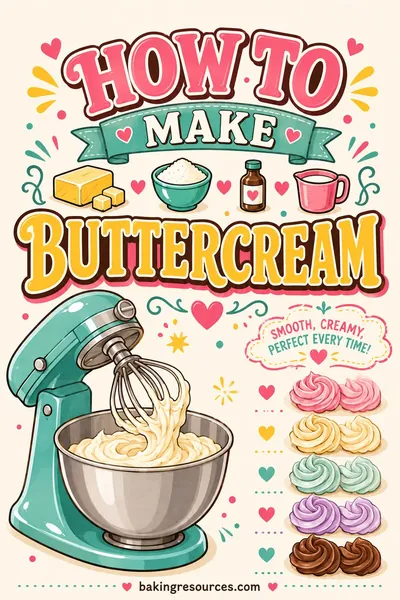
Frosting type matters, too. A sturdy American or Swiss meringue buttercream travels much better than a soft, loose one. If you are choosing a frosting with travel in mind, see how to make buttercream for options that set up firm.
Step 2: Use the Right Board
Every cake that travels needs a sturdy board under it. A plate or a thin piece of cardboard can flex when you lift it, and that flex is enough to crack frosting or split a layer.
Choose a board that is:
- At least 1 to 2 inches larger than the cake on every side, so you can hold the board without touching the frosting.
- Rigid, such as a thick corrugated cake board, a foam-core board, or a reusable cake drum.
- Grease-resistant on top, or covered with parchment or foil so butter does not soak through and weaken it.
Secure the cake to the board. Before you set the cake down, spread a small dab of frosting in the center of the board. It works like glue and keeps the cake from sliding around on top of the board.
For tall cakes, consider a center dowel. A long wooden dowel pushed down through the center of the cake into the board keeps layers from shifting sideways. For stacked tiers, each tier should sit on its own board with support dowels underneath, but again, transporting tiers separately is the safer choice whenever you can.
Step 3: Pick a Box That Fits
The box protects the cake from bumps, dust and accidental fingers, and it gives you something sturdy to hold.
A good cake box:
- Is only slightly larger than the board, so the board cannot slide around inside.
- Is tall enough that the lid does not touch the top of the cake or any decorations.
- Opens from the front or top in a way that lets you slide the cake in and out without tilting it.
If the box is a little too big, fill the gap with rolled-up towels or a non-slip mat cut to fit. You do not want the board to move at all when you gently tip the box.
For tall cakes, you may need a taller box or two boxes taped together. A clear-sided cake carrier is another option for layer cakes; many have a locking base that holds the board in place.
For sheet cakes, the pan with a fitted lid can work as the box if you baked and frosted the cake in the pan. Just make sure the lid does not touch the frosting.
For cupcakes, use a cupcake carrier with individual wells, or a box with an insert. Loose cupcakes slide into each other and smear their frosting.
Step 4: Know Where to Put It in the Car
Where the cake rides is as important as how it is packed.
The best spots:
- The floor of the passenger side or behind the front seat. It is flat, low and close to the air conditioning. Low spots move less on turns than high ones.
- A flat, level trunk or cargo area. This works well for larger boxes, as long as the floor is flat and the space is not hot. In hot weather, the trunk can warm up much faster than the cabin, so use it only if it gets air conditioning or the drive is short.
Spots to avoid:
- A seat cushion. Seats slope backward and are soft, so the cake tilts and bounces.
- Someone's lap. Even careful hands tip a cake on turns, and body heat softens frosting.
- Anywhere in direct sun. Sun through a window can melt frosting in minutes.
Make the surface non-slip. Place a rubber shelf liner, a yoga mat, or a non-slip mat under the box. This is the most underrated trick for how to transport a cake. It keeps the box from sliding on stops and turns, which is what knocks most cakes into the side of the box.
Check that it is level. If the car floor slopes, build it up with folded towels under the low side until the box sits flat.
Step 5: Control the Temperature
Heat is the enemy of frosting. Even a firm, chilled buttercream starts to soften in a warm car.
- Run the air conditioning for several minutes before loading the cake so the car is already cool.
- Keep the car cool for the entire drive, even if passengers would like it warmer.
- Use a sunshade on windows near the cake in sunny weather.
- For longer trips, place cold packs around the outside of the box (not touching the cake) or set the box inside a large cooler if it fits.
- Never leave the cake in a parked car, even for a quick stop.
In cold weather, the car is less of a problem, but avoid placing the cake right in front of a heater vent.
Step 6: Drive Like You Are Carrying a Cake
This sounds obvious, but it is worth saying:
- Start and stop gently.
- Take turns slowly and smoothly.
- Leave extra room between you and the car in front so you never have to brake hard.
- Pick a route with fewer sharp turns and speed bumps if you can.
- Avoid potholes and rough roads when there is a choice.
If someone else is driving, let them know you are carrying a cake. It is amazing how much smoother people drive when they know.
Step 7: Bring a Small Repair Kit
Even with perfect planning, a small smudge can happen. A tiny repair kit lets you fix it in a minute.
Pack:
- A small offset spatula
- A bench scraper or a smooth knife
- A small container of extra frosting in each color you used
- Piping bags already filled with border or decoration frosting
- A few extra decorations, such as sprinkles, candies or fresh berries
- Paper towels and a damp cloth
- A cake lifter or a large spatula, if you need to move the cake off the board
- Toothpicks for small fixes
Keep the extra frosting in a cooler bag with the cold packs so it stays the same texture as the frosting on the cake.
How to Transport Different Kinds of Cakes
Different cakes need slightly different handling. Use this table as a guide.
| Cake type | Chill first? | Best container | Extra tips |
|---|---|---|---|
| Two- or three-layer round cake | Yes, until firm | Snug cake box or locking carrier | Center dowel for tall cakes |
| Sheet cake | Yes | Lidded pan or flat box | Keep the pan level; do not stack anything on top |
| Tiered cake | Yes, each tier | Separate boxes per tier | Stack and finish on site whenever possible |
| Bundt or pound cake | Optional | Cake carrier or covered plate | Glaze sets better once fully cool |
| Cheesecake | Yes, must stay cold | Box or covered springform pan | Keep in a cooler; short drive |
| Cupcakes | Yes, briefly | Carrier with wells or box insert | Pipe frosting slightly lower for travel |
| Whipped cream cake | Yes, very cold | Snug box in a cooler | Add any garnish on arrival |
| Fondant-covered cake | Avoid fridge if your fondant sweats | Sturdy box on a non-slip mat | Keep cool and dry |
Planning a big event and wondering whether one cake will be enough? The cake serving size chart shows how many slices different pan sizes give, which helps you decide whether to bring one large cake or two smaller, easier-to-carry ones.
How to Transport a Cake Long Distance
For drives longer than about an hour, add a few more steps:
- Chill the cake overnight so it is cold all the way through.
- Use a cooler. A large cooler with cold packs around the box keeps the cake cold for hours. Make sure the box sits flat inside.
- Plan stops carefully. Park in the shade and keep the air running if you can, or take turns staying with the car.
- Consider decorating on site. For very long trips, bring the cake crumb-coated and chilled, and pipe borders or add decorations after you arrive.
- Choose a sturdy recipe. Dense cakes and firm frostings travel far better than light, airy ones.
Arrival: Unboxing and Touch-Ups
Once you arrive:
- Carry the box from underneath with both hands.
- Set it down in a cool spot, away from sunny windows, ovens and heaters.
- Open the box and check the cake before moving it.
- Slide the board out flat rather than lifting the cake straight up.
- Make any touch-ups with your repair kit.
Quick fixes for common smudges:
- Small smudge on the side: Dip the offset spatula in hot water, wipe it dry, and smooth the area. Add a thin layer of extra frosting if needed.
- Dent in the top: Fill with a little frosting and smooth, or cover with a decoration.
- Damaged border: Pipe a fresh section of border over it.
- Bare spot: Cover with sprinkles, berries, or a few piped rosettes.
- Fallen decoration: Reattach with a small dab of frosting.
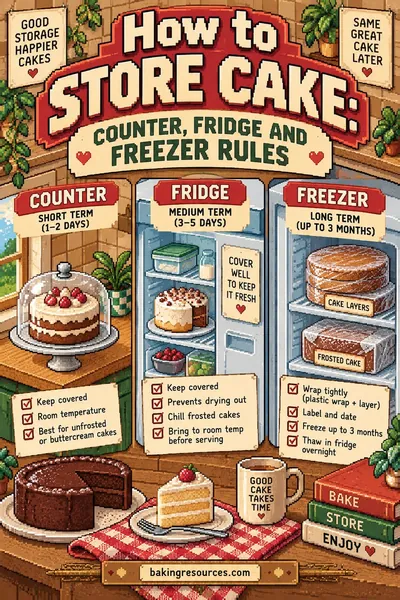
If the cake will sit out for a while before serving, keep it somewhere cool. For leftovers, see how to store cake so the rest stays fresh after the party.
Common Mistakes to Avoid
Transporting a warm cake. A cake that just came off the cooling rack and was frosted right away is too soft to travel. Chill it first.
Using a box that is too big. If the board can slide inside, the cake will hit the sides on the first turn.
Putting the cake on a seat. Seats slope and bounce. The floor is flatter and more stable.
Skipping the non-slip mat. A box sliding on a smooth floor or trunk liner is the most common cause of a smashed cake side.
Stacking tiers before the trip. Stacked cakes are top-heavy and much harder to keep steady. Stack on site when you can.
Leaving the cake in a parked car. Even a short stop on a warm day can melt frosting.
Adding fragile decorations before the trip. Tall toppers, delicate sugar work and fresh flowers are safer added on arrival.
FAQ
What is the best way to transport a cake in a car?
Chill the cake, put it on a sturdy board in a snug box, and set the box on a non-slip mat on a flat surface, ideally the floor behind the front seat or a level, cool cargo area. Keep the car cool and drive gently.
How long should I chill a cake before transporting it?
At least 1 to 2 hours for a frosted layer cake, or until the frosting feels firm to a light touch. Overnight chilling is even better for long drives or tall cakes, if your frosting can be refrigerated.
Can I hold the cake on my lap in the car?
It is not a good idea. Laps are not level, they move with the car, and body heat softens frosting. A flat spot on the floor with a non-slip mat is much safer.
How do I transport a tiered cake?
The safest way is to transport each tier separately in its own box and stack them at the venue. If you must move a stacked cake, make sure each tier has its own board and supports, use a center dowel through all tiers, and keep the cake very cold.
How do I keep a cake from melting in a hot car?
Pre-cool the car with the air conditioning, keep it running the whole drive, shade the windows, and place cold packs around the box or use a cooler. Never leave the cake in a parked car.
What should I bring in a cake repair kit?
A small offset spatula, extra frosting in each color, a filled piping bag for borders, a few spare decorations, paper towels, and a damp cloth. That covers almost every smudge or dent.
Should I put cupcakes in the fridge before transporting them?
A short chill helps the frosting set, which makes them less likely to smear. Pack them in a carrier with individual wells so they cannot slide into each other.