How to Braid Bread: 3, 4 and 6 Strand Braids Step by Step

To learn how to braid bread, divide a risen, enriched dough into equal pieces by weight, roll each into a smooth rope of the same length, pinch the ends together, and cross the strands over each other in a set pattern. Then let the braid proof until puffy, brush it with egg wash, and bake until deep golden.
A braided loaf looks like it came from a bakery window, but the method is simple once you know the patterns. The real secrets are not in the weaving at all. They are in using the right dough, weighing the pieces, rolling even ropes, and keeping the braid loose enough to grow in the oven.
This guide picks up where kneading ends. It covers the best doughs for braiding, how to divide and roll ropes, step-by-step patterns for 3, 4 and 6 strands, shaping round braids, proofing, egg wash, baking, and the mistakes that make braids crack or lose their shape.
Quick Guide: Which Braid to Choose
| Braid | Difficulty | Look | Best for |
|---|---|---|---|
| 3-strand | Easy | Classic flat plait | First braids, sandwich loaves, small rolls |
| 4-strand | Moderate | Taller, rounder, woven look | Holiday tables, gifting |
| 6-strand | Moderate to tricky | Tall, full, very decorative | Celebration loaves, centerpieces |
| 3-strand round | Easy | Wreath shape | Holiday rings, sharing bread |
If you have never braided before, start with three strands. Once that feels natural, the four and six strand patterns are just a matter of following a short repeating sequence.
The Best Doughs for Braiding
Braiding works best with a dough that is soft but not sticky, and stretchy enough to roll into ropes without tearing. Enriched doughs, made with eggs, butter or oil, milk and a little sugar, are the classic choice. They hold a crisp pattern, bake up with a soft crumb, and brown beautifully.
| Dough type | How it braids | Notes |
|---|---|---|
| Egg bread (challah-style) | Excellent | The traditional braiding dough; holds shape well |
| Milk bread or sweet roll dough | Very good | Soft and easy to roll |
| Brioche | Fair | Very buttery; chill before rolling so it does not get greasy |
| Basic white sandwich dough | Good | Works fine; pattern is a little less defined |
| Whole wheat dough | Fair | Ropes tear more easily; keep strands thicker |
| Wet, high-hydration dough | Poor | Too slack to hold a pattern |
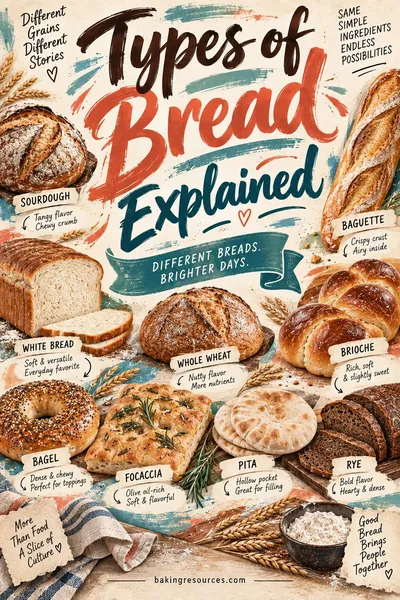
If you want to explore which loaves are traditionally braided, the types of bread guide gives a quick tour of enriched and lean loaves.
Getting the dough ready
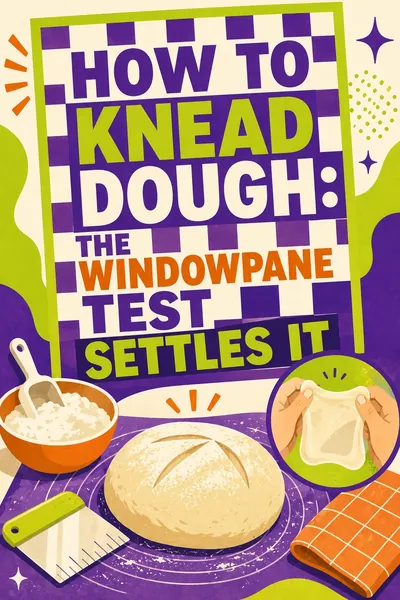
- Knead well. The dough should be smooth, elastic and slightly tacky. A well-kneaded dough rolls into ropes without tearing. If you need a refresher, see how to knead dough.
- Let it rise once. A first rise until roughly doubled develops flavor and makes the dough easier to shape.
- Check for stickiness. If the dough sticks to your hands and the counter, lightly flour your hands, not the counter. If it is very sticky, the why is my dough too sticky guide has fixes.
Make sure your yeast is active before you start, especially if it has been in the pantry a while. The how to proof yeast guide shows the quick foam test.
How to Divide and Roll Even Ropes
Even ropes are the single biggest factor in a neat braid. Uneven strands give you a lopsided loaf no matter how well you weave.
Step 1: Weigh and divide
Gently press the risen dough to release some gas. Weigh the whole piece, then divide by the number of strands. Cut each piece with a bench scraper or knife rather than tearing it, and weigh each one. Add or pinch off small bits until every piece is within a few grams of the others.
Step 2: Pre-shape into logs
Flatten each piece into a rough rectangle, then roll it up tightly into a short log. Pinch the seam closed. Cover the logs with a towel and let them rest for 10 to 15 minutes. This rest relaxes the gluten so the ropes stretch instead of springing back.
Step 3: Roll into ropes
Place a log on an unfloured or very lightly floured counter. A little friction helps the dough grip and stretch. Starting with both hands together in the center, roll back and forth while slowly moving your hands outward toward the ends. Press lightly and keep the pressure even.
- If the dough fights you and shrinks back, cover it and let it rest another 5 minutes, then continue.
- Roll all the ropes partway, then go back and finish each one. Giving each a short rest along the way makes the job easier.
- Taper the ends slightly for a neat finish.
How long and thick should ropes be?
| Loaf | Strands | Approximate rope length |
|---|---|---|
| Small loaf | 3 | 12 to 14 inches |
| Standard loaf | 3 | 16 to 18 inches |
| Standard loaf | 4 | 16 to 18 inches |
| Large loaf | 6 | 16 to 20 inches |
| Wreath | 3 | 24 inches or more |
All the ropes in a braid should be the same length and thickness. A ruler or the edge of a baking sheet makes a handy guide.
How to Braid Bread With 3 Strands
This is the classic braid and the best place to start learning how to braid bread.
- Line up the ropes. Lay three ropes side by side, vertically, a little apart.
- Start in the middle. Braiding from the middle out gives a more even loaf than starting at one end. Pinch the ropes together loosely at their centers, or simply start weaving from the center.
- Braid toward you. Cross the right rope over the middle rope. Now cross the left rope over the new middle rope. Repeat, right over middle, left over middle, until you reach the end.
- Pinch and tuck. Pinch the ends together firmly and tuck them under the loaf.
- Turn and finish. Rotate the loaf so the unbraided half faces you. This time, cross the strands under the middle instead of over (right under middle, left under middle). This keeps the pattern matching on both halves.
- Pinch and tuck the second end.
Tips for a neat 3-strand braid
- Keep the braid fairly loose. The dough needs room to expand.
- Lay each strand down gently instead of stretching it.
- If one end looks thinner, gently push the loaf together from both ends to even it out.
How to Braid Bread With 4 Strands
A 4-strand braid looks taller and more woven than a 3-strand. The easiest way to follow it is to number the positions, not the ropes. The rope sitting in position 1 changes as you work, but the positions stay fixed from left to right.
- Set up. Lay four ropes side by side, vertically. Pinch them together firmly at the top.
- Number the positions 1, 2, 3, 4 from left to right.
- Follow the sequence:
- Move the rope in position 4 over the rope in position 2.
- Move the rope in position 1 over the rope in position 3.
- Move the rope in position 2 over the rope in position 3.
- Repeat the three moves until the ropes are too short to continue.
- Pinch and tuck the bottom ends under, and tuck the top ends under too.
Saying the pattern out loud helps: "four over two, one over three, two over three." After a few rounds your hands learn it.
How to Braid Bread With 6 Strands
The 6-strand braid makes a tall, full loaf that looks impressive on any table. It takes a little focus, but it is a short repeating pattern. Again, number the positions 1 through 6 from left to right.
- Set up. Lay six ropes side by side, vertically, and pinch them together firmly at the top. Fan the ropes out slightly.
- Starting move (do this once): Move the rope in position 6 over to the far left, over position 1. Everything shifts, so renumber positions 1 to 6 from left to right again.
- Follow the repeating sequence:
- Move position 2 over to the far right (it becomes the new position 6).
- Move position 1 over to position 3.
- Move position 5 over to the far left (it becomes the new position 1).
- Move position 6 over to position 4.
- Repeat the four moves until you reach the ends of the ropes.
- Pinch the ends together firmly and tuck both ends under the loaf.
Keep an eye on the pattern. The "outside" ropes always travel to the opposite side or into the middle, and the two moves into the middle create the raised center ridge.
If you lose your place
Stop and look at the ropes. The two outer ropes on each side should be lying in the opposite direction from the ropes in the middle. Find the last move you made, then carry on from the next step. Small mix-ups usually still bake into an attractive loaf.
Round Braids and Wreaths
A braided wreath is perfect for holidays and sharing.
- Roll three ropes about 24 inches long or longer.
- Braid them in a 3-strand pattern from end to end. Do not tuck the ends.
- Carefully lift the braid onto a parchment-lined baking sheet and curve it into a circle.
- Overlap the ends slightly and pinch them together, or weave the loose strands into each other and tuck the join underneath.
- Place an oven-safe bowl or a ring of foil in the center if you want to keep the hole open while it proofs and bakes.
You can also coil a long single braid into a spiral turban shape, tucking the end underneath.
Proofing a Braided Loaf
After braiding, move the loaf to a parchment-lined baking sheet. Cover it loosely with plastic wrap or a clean towel and let it proof until it looks noticeably puffy, usually about 45 minutes to 1 1/2 hours, depending on the dough and the warmth of your kitchen.
How to tell when the braid is ready
- It has grown visibly, roughly by half or a little more.
- The strands look puffy and the gaps between them have mostly filled in.
- A light fingertip press leaves a small dent that springs back slowly.
Under-proofed braids can tear along the strands in the oven. Over-proofed braids lose their crisp pattern and may collapse slightly. If you see big tears in a baked braid, give the next one a little more proofing time.
Egg Wash for a Golden Braid
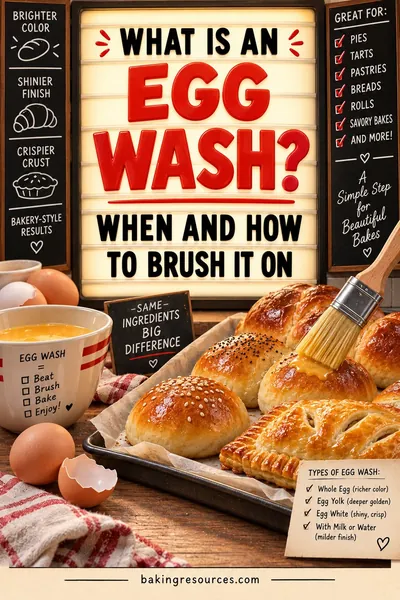
Egg wash is what gives braided bread its deep color and shiny finish. It also helps toppings like sesame or poppy seeds stick. For a full guide to the different washes and the finish each one gives, see what is an egg wash.
How to wash a braid
- Whisk one egg with a tablespoon of water or milk and a pinch of salt. Strain it if you want an extra-smooth finish.
- Brush a thin, even coat over the braid once it is shaped, before the final proof. Use a soft brush and go gently into the creases.
- Brush a second coat right before baking. Two thin coats give a richer, glossier color than one thick coat.
- Avoid puddles where strands meet. Pooled egg can bake into a scrambled-looking patch.
- Sprinkle on seeds or pearl sugar right after the second coat, if you like.
| Wash | Finish |
|---|---|
| Whole egg + water | Golden and shiny; the all-round choice |
| Egg yolk + cream or milk | Deep brown and very glossy |
| Egg white + water | Light shine, pale color |
| Milk only | Soft, matte, light brown (egg-free) |
Baking a Braided Loaf
Most enriched braided loaves bake at around 350 to 375 °F. A standard loaf usually takes about 25 to 35 minutes, and a large 6-strand loaf can take longer. Always follow your recipe as the main guide.
- Brown too fast? Tent the loaf loosely with foil for the last part of baking.
- Check doneness. The loaf should be deep golden all over, including the creases, and sound hollow when tapped on the bottom. An instant-read thermometer in the thickest part should read about 190 °F for enriched bread. The how to tell when bread is done guide has more ways to check.
- Cool on a rack. Let the loaf cool for at least 30 minutes before slicing so the crumb sets.
Common Mistakes to Avoid
Uneven ropes. Eyeballing the pieces gives a lopsided braid. Weigh them.
Skipping the rest. If ropes keep shrinking back, the gluten is tight. Rest the dough, then roll again.
Flouring the counter heavily. Too much flour keeps the ropes from gripping the counter and stops the strands from sticking together. Use little or none.
Braiding too tightly. A tight braid has nowhere to expand and splits in the oven. Lay strands down loosely.
Pinching the ends weakly. Ends that are not sealed can come apart while proofing. Pinch firmly and tuck them well under.
Under-proofing. A braid that goes into the oven too early will tear along the strands.
Thick egg wash. Pooled wash in the creases looks blotchy. Brush thin coats.
Using a very wet dough. Slack dough loses the pattern. Choose a firmer enriched dough for braiding.
Making Ahead and Storing
- Overnight: Braid the loaf, cover it well, and refrigerate overnight. In the morning, let it sit at room temperature until it finishes proofing, then wash and bake. Cold dough takes longer to proof.
- Freezing: Baked, cooled braided loaves freeze well. Wrap tightly and freeze; thaw at room temperature in the wrapping. The how to freeze bread guide covers wrapping and reheating.
- Leftovers: Day-old braided egg bread makes excellent French toast and bread pudding.
FAQ
What is the easiest way to learn how to braid bread?
Start with a 3-strand braid using an enriched dough. Weigh the pieces, rest them before rolling, and braid from the middle out to each end for an even loaf.
Why do my bread ropes keep shrinking back?
The gluten is tight. Cover the dough and let it rest 5 to 15 minutes, then roll again. Pre-shaping into short logs and resting before rolling helps a lot.
Should I flour the counter when rolling ropes?
Use very little or none. A bit of friction helps the dough stretch into long ropes. Lightly flour your hands instead if the dough is sticky.
Why did my braided bread split in the oven?
Usually the braid was too tight or under-proofed. Braid more loosely and let the loaf proof until it is visibly puffy before baking.
Can I braid bread dough the night before?
Yes. Shape the braid, cover it well, and refrigerate overnight. Let it come up to room temperature and finish proofing before washing and baking.
Do I have to use egg wash on braided bread?
No, but it gives the classic golden shine. For an egg-free option, brush with milk or a little melted butter after baking.
What dough is best for a 6-strand braid?
A firm, enriched egg dough is ideal. It rolls into long, even ropes and holds the raised pattern during proofing and baking.